Popular

Template Information

Welcome To Sora Films

Browsing "Older Posts"

Gmail ဟက္မခံရေအာင္ Back Up လုပ္ျခင္း

/

 http://static.techspot.com/articles-info/370/images/gmail-backup.jpg
ကိုယ္႔ password သိတဲ႔ တစ္စံုတစ္ေယာက္က ကိုယ္႔ဆီက Email ေတြကို ကိုယ္မသိပဲ ျဖစ္ေစ၊ သိၿပီးမွ ျဖစ္ေစ ယူသြားျခင္း ခံလိုက္ရ သူေတြ အတြက္နဲ႔ ကိုယ္႔ Email အခ်င္းခ်င္း Data ေတြေျပာင္းေရႊ႕ရာမွ ရပ္တန္႔ခ်င္သူေတြ အတြက္ ျပန္ေျဖနည္း တစ္ခုပါ။ ကိုယ္ password ေပးဖူးတဲ႔ တစ္ေယာက္ေယာက္ က ကိုယ္႔ဆီက Email ေတြကို ပထမ post မွာ ေဖာ္ျပခဲ႔သလို နည္းလမ္းအတိုင္း download ခ် သြားၿပီ ဆိုပါဆို႔။ အေဟာင္းေတြ ပါသြားတာေတာ့ ဘာမွ မတက္နုိင္ေတာ႔ ပါဘူး။ အေဟာင္းေတြ ပါသြားတာကို တားလို႕မရေပမယ္႔ အသစ္ေတြ သူ႕ဆီမဝင္ေအာင္ တားဖို႔ လိုပါတယ္။ အဲဒီအတြက္ သိသင္႔တဲ႔ အခ်က္ မ်ား ကို တစ္ပိုင္းခ်င္း ေဖာ္ျပေပးပါမယ္။
ပထမ တစ္ခုကေတာ႔ ကိုယ္႔ထဲကေန ထပ္မထြက္နုိင္ေအာင္ အားလံုး ပိတ္ပစ္ဖို႔ပါ။ လုပ္ေဆာင္မႈ အဆင္႔ဆင္႔ကေတာ႔ အရမ္းရိုးရွင္းပါတယ္။

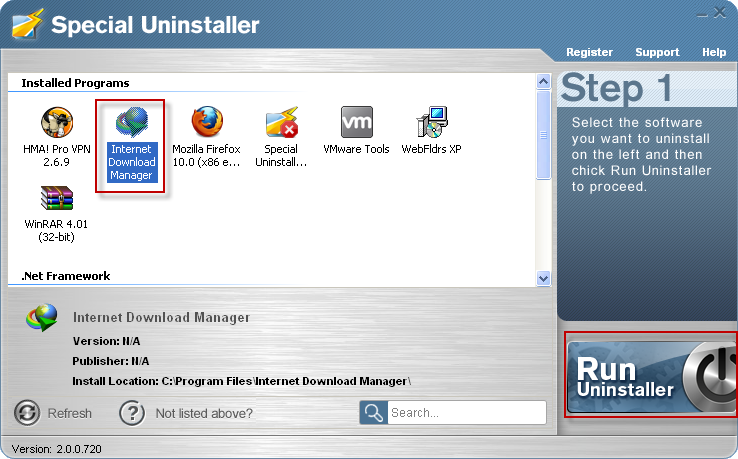
1. Settings ကိုသြားပါ။
2. Forwarding and POP/IMAP tab ကို ဆက္သြားပါ။
3. Forwarding, POP Download နဲ႔ IMAP Access တို႔ အားလံုးကို Disable forwarding, Disable POP နဲ႔ Disable IMAP အသီးသီး ေပးလိုက္ပါ။
4. ၿပီးရင္ Save Changes button ကို click လိုက္ပါ။


အားလံုး ပိတ္ၿပီးသား ျဖစ္သြားပါလိမ္႔မယ္။ ပိတ္လိုက္တဲ႔ အခ်ိန္က စ ၿပီး ေနာက္ထပ္ Mail တစ္ေစာင္မွ တစ္ျခားတစ္ေယာက္ဆီ ေရာက္မွာ မဟုတ္ေတာ႔ပါဘူး။
တကယ္လို႔ ကိုယ္ အားလံုး ကို Disable ေပးထားခ်ိန္မွာ တစ္စံုတစ္ေယာက္ေယာက္က POP3 download နဲ႔ download ခ် ဖို႔ ႀကိဳးစားမယ္ ဆိုရင္ သူ႔ဖက္မွာ ေအာက္ေဖာ္ျပပါ ပံု အတိုင္း ေပၚေနပါလမ္႔မယ္။


ဒုတိယ သိရမယ္႔ တစ္ခု ကေတာ႔ ကိုယ္႔ Gmail account password ကို သိတဲ႔ တစ္ေယာက္ေယာက္က ကိုယ္႔ဆီကေန Email ေတြကို POP3 မွာ download ဆြဲေနတယ္ ဆိုရင္ ကိုယ္႔ဆီ ကို ဝင္လာတဲ႔ Email တစ္ေစာင္ဟာ ကိုယ္႔ဆီက download ဆြဲေနတဲ႔ လူဆီကို ခ်က္ခ်င္း မေရာက္ပါဘူး။ အနည္းဆံုး ၁ နာရီ ကေန အမ်ားဆံုး ၄ နာရီ အတြင္းမွာမွ download ခ် လို႔ရတာပါ။ ဆိုလိုတာက ကိုယ္႔ဆီ ကို တစ္ေစာင္ အသစ္ဝင္တာနဲ႔ download ဆြဲေနတဲ႔ လူဆီကို လည္း တစ္ေစာင္ အသစ္ ခ်က္ခ်င္း ဝင္တာ မဟုတ္ဘူး ဆိုတာပါပဲ။ တကယ္လို႔ ကိုယ္႔ဆီကို ဝင္လာတဲ႔ Email တစ္ေစာင္ကို ဝင္လာၿပီးလို႔မွ တစ္နာရီ မၾကာေသးခင္မွာပဲ delete ေပးလိုက္မယ္ဆိုရင္ download ဆြဲေနတဲ႔ လူဆီကို လံုးဝ ေရာက္သြားမွာ မဟုတ္ပါဘူး။ download စ မဆြဲခင္ အခ်ိန္တုန္းက ရွိသမွ် Mail အားလံုးကေတာ႔ မိနစ္ပိုင္းအတြင္း အားလံုး ေရာက္မွာပါ။
တတိယတစ္ခု ကေတာ႔ အႏၲရာယ္အမ်ားဆုံး ကိစၥ လို႔ ေျပာလို႔ ရပါတယ္ ကိုယ့္ရဲ့ Mail ကို တျခားလူ တစ္ေယာက္ေယာက္ က POP3 download နဲ႔ ပထမ post မွာ ေဖာ္ျပခဲ႔သလို လုပ္သြားျပီးျပီ ထားပါေတာ့ အဲဒါဆိုရင္ သူ႕ရဲ့ Mail ထဲမွာ Compose Mail လုပ္မယ္ဆိုရင္ ေအာက္မွာျပထားတဲ့ ပုံအတိုင္း From: ဆိုတဲ့ Dropdown ေလးတစ္ခုအပိုေပၚလာလိမ့္မယ္။


ပုံမွန္ ဆိုရင္ Compose Mail လုပ္ရင္ အဲဒီ Dropdown မရွိပါဘူး။ ကိုယ့္ Mail ထဲမွာျပန္ၾကည့္ၾကည့္ပါ။ ဘာလို႕လဲဆိုေတာ့ ပုံမွန္ဆို Email တစ္ခုက Mail Address တစ္ခုတည္းကိုပဲ ပိုင္တာ ျဖစ္တဲ့အတြက္ From: ဆိုတာ ေပၚစရာ မလိုဘူးေလ။ ေရြးစရာမွ မလိုတာ။ ဒါေပမဲ့ အခုလိုျဖစ္သြားရင္ Email တစ္ခုတည္းက Mail Address ႏွစ္ခု ပိုင္သလိုျဖစ္သြားပါတယ္။ ကိုယ့္ Mail ကိုလည္း တစ္ဖက္လူက ပိုင္သြားပါျပီ။ အဲဒီေတာ့ အဲဒီ Dropdown မွာသူ႕ Mail ရယ္ကိုယ့္ Mail ရယ္ ႏွစ္ခု ေပၚေနလိမ့္မယ္။ အဲဒီအထဲက သူကကိုယ့္ရဲ့ Mail ကိုေရြးျပီး အျခား တစ္ေယာက္ေယာက္ဆီကို Email ပို႕လိုက္ရင္ လက္ခံ ရရွိတဲ့သူက ကိုယ့္ဆီက ရတာလို႕ပဲ ထင္သြားမွာပါ။ ဘာလို႕လည္းဆိုေတာ့ လက္ခံရရွိတဲ့သူဆီမွာကိုယ့္ Mail Address သြားေပၚေနမွာကိုး။ ပို႕တာကသူ႕ ထဲကပို႕တာေနာ္။ ကိုယ္ေတာင္ ဘာမွမသိလိုက္ရဘူး။ ကဲကိုယ့္ရဲ့ အေရးၾကီးတဲ့ Contact ေတြဆီကို ေပါက္ကရ Mail ေတြေလွ်ာက္ပို႕လိုက္လို႕ကေတာ့ေသျပီ။ ဘယ္ေလာက္ အႏၲရာယ္မ်ားလဲ စဥ္းစားသာၾကည့္ေပေတာ့။ အဲဒီေတာ့ အေကာင္းဆုံးက ကိုယ့္ရဲ့အေရးၾကီးတဲ့ Mail ရဲ့ Password ကိုဘယ္သူ႕ကိုမွ မေပးတာအေကာင္းဆုံးပါ။ Password ဆိုတာ Mail တစ္ခုရဲ့အသက္ပါ။ Password ကို မကာကြယ္ႏိုင္ဘူးဆိုမွေတာ့ Mail ရဲ့အသက္လည္းေသျပီေပါ့။ အားလုံးပဲ ကိုယ့္ရဲ့ Email Password ေလးေတြကို လံုလံုျခဳံျခဳံ သိမ္းႏိုင္ၾကပါေစ။

Android Battery Virus သတိေပးခ်က္

/

Android ဖုန္းအသံုးျပဳေနသူမ်ားသို႕ Android Battery Virus အေၾကာင္းအသိေပးပါရေစ
ဖုန္းအတြင္း Internet အသံုးျပဳျခင္း Buletooth မ်ားအသံုးျပဳျခင္း တို႕ေၾကာင့္အမ်ားဆံုး
၀င္ေရာက္ပါတယ္..အဓိက ျပန္႕ႏွံ႕တာကေတာ့ အင္တာနက္ကေနျဖစ္ပါတယ္
Android ဖုန္း အသံုးျပဳေနသူ User မ်ားရဲ႕ Android Battery စနစ္ကိုတိုက္ခိုက္တဲ့ Virus
ျဖစ္ပါတယ္.. ဘယ္လိုအက်ိဳးသက္ေရာက္မႈရွိသလဲဆိုရင္ ဒီ Virus ၀င္ေရာက္တိုက္ခုိက္
ခံရသည့္ Android Phone ရဲ႕ Battery ဟာ အရင္ေလာက္ အား ( Power ) သက္တမ္း
ၾကာရွည္မခံေတာ့ျခင္း ၊ Battery အကုန္ျမန္ေစၿပီး Battery ကုန္လုိ႕အားသြင္းလိုက္ရင္လည္း
ငါးမိနစ္ ဆယ္မိနစ္ျဖင့္ Battery အားျပည့္ေၾကာင္းျပျခင္း ၊ သံုးလုိက္ပါက ခ်က္ခ်င္းကုန္သြား
ျခင္း ၊ အဆိုးဆံုးအဆင့္တြင္ Virus Attack ျဖစ္ေနတဲ့ Android ဖုန္းမွာလံုး၀ Battery သံုးမရ
ေတာ့ျခင္းတို႕ျဖစ္ေပၚလာပါတယ္.. ဒီ လိုမ်ိဳး ၾကံဳေတြ႕လာရၿပီဆိုရင္ေတာ့ ဖုန္းမွာ Antivirus
တင္ထားလဲ ခဏတာသာထိန္းခ်ဳပ္ႏိုင္ၿပီး လံုး၀ သတ္ပစ္ဖို႕ေတာ့စြမ္းေဆာင္ႏိုင္မွာ မဟုတ္
ပါဘူး..ဒီလိုျဖစ္လာခဲ့ရင္ အေကာင္းဆံုးေျဖရွင္းနည္းက ဖုန္းရဲ႕ SD Card ကို Format ခ်ပစ္ပါ
ၿပီးတာနဲ႕ မိမိရဲ႕ဖုန္းကို Factory Reset ခ်ပစ္ပါ SD Card မ်ားကို တစ္ဦးႏွင့္တစ္ဦး လဲလွယ္
အသံုးျပဳျခင္း တတ္ႏိုင္သမွ်ေရွာင္ပါ လို႕ အသိေပးအပ္ပါတယ္။

Windows 7 Logon Background Changer 1.5.2.0 (2 MB)

/
Windows 7 မွာ Background Logo ေလးေတြေျပာင္းခ်င္သူမ်ားအတြက္ပါ..အသံုးျပဳ ရတာလဲလြယ္ပါတယ္
Download ရယူႏိုင္ၾကပါၿပီ...


Download >> Link 1 / Link2

Windows 7 Logon Background Changer is an application that enables you to modify the Windows logon picture safely and with just a few clicks.


Making the change takes only a few seconds and Windows 7 Logon Background Changer doesn’t even require a reboot to complete the operation. Nonetheless, you will see the new wallpaper only when you restart the computer.

Since it applies a series of changes to the operating system, you should use a backup software just to be safe in case something goes wrong. The utility takes the input picture and turns it into a JPG file, automatically adjusting the dimensions and quality. It's a very light application that is truly easy to use and comes with a nice set of pictures you can choose from, while also offering you the possibility to add your own photos to the list.

What does it do?


  • It does NOT change any system file, and the program itself does not requires admin rights to run : it will just ask you to run as admin a very simple cmd file that creates the required folder and registry key with the appropriate rights. Any user of the computer will then be able to change the Windows 7 logon screen wallpaper. You can also prevent users from being able to change the logon screen wallpaper if you don't want them to be able to modify it without administrator rights (option available by clicking on the "Settings" button).
  • It creates a few JPEG files based on the image you want to put as wallpaper for the Windows 7 login screen, applies the appropriate cropping and sizing and saves them using the best compression quality possible.


Change Log in 1.5.2 (2012/04/13) :
  • Fixes the thumbnail loading bug
Screenshots:


Loaris Trojan Remover 1.2.8.4 Full Version ( 20 MB )

/
Trojan ,Virus ,Malware ,Spyware , စတဲ့ စတဲ့ Program မ်ားဟာ ကြန္ပ်ဴ တာကို အင္မတန္မွ ဒုကၡေပးၿပီး
User ေတြရဲ႕ Data ေတြကိုခိုးယူဖ်က္ဆီးပစ္ၾကပါတယ္.အဓိကကေတာ့ Trojan နဲ႕ Virus ကအဆိုးဆံုးပါ
ဒီေကာင္ေတြကို သတ္ပစ္ႏိုင္ဖုိ႕အတြက္ အခု Software ေလးဟာလညး္ စမ္းသပ္အသံုးျပဳသင့္ပါတယ္..
Trojan ေတာ္ေတာ္မ်ားမ်ားကို သတ္ပစ္ႏိုင္ၿပီး Antivirus မ်ားႏွင့္လည္းတြဲဖက္အသံုးျပဳႏိုင္ပါတယ္
Download ရယူႏိုင္ၾကပါၿပီ။

Are you bombarded with popup ads, seeing new toolbars in your browser, is your home page changing to unwanted destinations or are you bombarded with irritating spam? Perhaps strange software loads on startup or your favorites have new entries that YOU DONT WANT. If So.. Your PC is most likely infected with adware, spyware, spybot, trojans or another internet parasite. These programs have the ability to track your browsing habits and even steal such personal information as bank account numbers and passwords.

Spyware has the power to install more parasites on your computer without your consent. Everything you do and everything you type is being recorded right now! Companies know what your interests are! Hackers will access your PC and do anything they wish. They can even steal your Identity and You would never be the wiser! The Solution: Download the latest version of Loaris Trojan Remover right now. You will be able to completely clean your computer of all these invasive threats! Your computer will be clean and will run alot faster – Your Privacy will be Protected!

What is Loaris Trojan Remover?
Trojan Remover aids in the removal of Malware – Trojan Horses, Worms, Adware, Spyware – when standard anti-virus software either fails to detect them or fails to effectively eliminate them. Standard antivirus programs are good at detecting this Malware, but not always good at effectively removing it.

Home Page : www.loaris.com

ဖုန္းမ်ားတြင္ Message Centre Code ေျပာင္းနည္း-Android

/


ဖုန္းေတြမွာ Message အ၀င္မရတာအထြက္မရတာနဲ႔
Message Center Code ခ်ိန္းခ်င္တာေတြ အတြက္
ပံုေလးနဲ႔ တကြ နားလည္သေဘာေပါက္ေအာင္
ရွင္းျပေပးလုိက္ပါတယ္...

1. အရင္ဆံုး Message ကို ၀င္လိုက္ပါ။
Image
2. ေအာက္က ပံုပါ အတုိင္း Menu Touch ကိုႏွိပ္ပါ။
Image
3. Setting ေပၚလာပါက Setting ကို၀င္ပါ။
Image
4. Message Centre ကို ၀င္ပါ နဂို ရွိေနတဲ့ Code ကို ျဖဳတ္ပစ္ပါ။
Image
5. ျမန္မာႏိုင္ငံရဲ႕ Message Centre Code ကေတာ့ +9595930014(or) +9595930003 ပါ။
Image
 
6. ကိုယ္ရိုက္ခ်င္တဲ့ Code ကို ရိုက္ၿပီးေတာ့ OK ဒါမွမဟုတ္ Done ကို ႏွိပ္ပါ။
ဒါဆိုရင္ေတာ့ SMS အ၀င္အထြက္ အဆင္ေျပသြားပါၿပီ။ အျခား Huawei ဖုန္းမ်ားမွာလည္း ဒီနည္းအတိုင္း
Message Setting မွာ Message Center ကိုရွာၿပီး ေျပာင္းေပးရပါ့မယ္။

iPhone Message Center Code ခ်ိန္းျခင္း

/

fix sending sms problems on iPhone

 
အမ်ားဆံုး ျဖစ္ေနၾကတဲ့ ျပသနာ တစ္ခုပါပဲ
iPhone ေတြမွာ Message အ၀င္အထြက္မရတာ အဆင္မေျပတာတဲ့
  သူေတြအတြက္ နည္းလမ္းေလးပါ:)

အရင္ဆံုး ကိုယ့္ Message Center Code မွန္မမွန္ အရင္စစ္ေဆးပါမယ္..
ဖုန္းေခၚဆိုရာ Keypad ကို ဖြင့္ပါမယ္
ေအာက္ပါ အတုိင္း ရိုက္ပါ
*#5005*7672#
sms problem iPhone
ၿပီးရင္ Call ကို ႏွိပ္ပါ။
လက္ရွိ ရွိေနေသာ Message Center Code ပါ။
sms problem iPhone 1
ၿပီးရင္ေတာ့ ဖုန္းေခၚဆိုရာ Keypad ကို ျပန္ဖြင့္ပါ
**5005*7672*your Service Center number#
အထက္ပါအတိုင္း Your Service Center Number ေနရာတြင္ +9595930003 ကို အစားထိုးၿပီးေတာ့
Call ကို ေခၚဆိုလုိက္ပါ။
sms problem iPhone 2
ဒီလိုေပၚလာၿပီ ဆိုရင္ေတာ့ သင္ ဒုကၡေရာက္ေနတဲ့ Message အ၀င္အထြက္မရတာ
အဆင္ေျပသြားပါလိမ့္မယ္..

Huawei U8818 ကို 4.1.2 နဲ႔ လန္းခ်င္သူမ်ားအတြက္

/
http://myanmarmobilesoftwaredeveloper.com/wp-content/uploads/2012/11/images.jpg
U8818 ကုိ Custom Firmware 4.1.2 တင္ခ်င္တဲ့သူမ်ားအတြက္ ရွာေဖြၿပီးတင္ေပးလိုက္ပါတယ္။
အရင္ဆုံး U8818 က 4.၀ အေနအထားမွာဆုိရင္ CWM အရင္ သြင္းရပါမယ္….
CWM Installer     (DropBox)
password:phyochan

CWM ကေတာ့လြယ္ပါတယ္..
Fastboot အရင္၀င္ရမယ္…
Volume Down + Power ကုိဖိႏွိပ္လုိက္….
Logo မွာရပ္ေနပါလိမ့္မယ္….
CWM Installer ကုိ Extract လုပ္လိုက္ရင္ .bat ဖုိင္ေလးေတြလိမ့္မယ္….
ဒါကုိ Run လုိက္ရင္ရျပီေပါ့။
ျပီးရင္ေတာ့ Custom Firmware ေလးကုိ ေဒါင္းရမယ္..

ShenDu-U8818-v4.1.2-121123_CM10mod_R1.zip

ျပီးရင္ေတာ့ SD Card ထဲထည့္လုိက္မယ္…
Volume up + Power နဲ႕ Recovery mode ၀င္လုိက္မယ္…
Install from SD Card ကုိ ေရြးလုိက္မယ္..
Firmware ကုိေရြးမယ္….
Wipe Cache နဲ႕ Wipe Factory Reset ခ်လုိက္မယ္..
Reboot System Now ေရြးမယ္..
ဒါဆုိရပါျပီ…..

ျမန္မာစာထည့္ရင္ေတာ့ Zawgyi Changer နဲ႕မရဘူး..
ဒါေလးေဒါင္းျပီး CWM ကေနထည့္လုိက္ပါ။

All Of Internet Setting for Android

/
GSM Internet Setting ခ်ိန္နည္း။
ဖုန္းတိုင္း မတူညီ၍ တသတ္မွတ္တည္းေတာ့ သတ္မွတ္၍ မရပါဘူး။

Name _ နွစ္သက္ရာ ထည့္နူိင္ပါသည္။
APN   _ mptnet
Proxy _ မလိုပါဘူး။
Port   _ မလိုပါ။
Username_ မလိုပါ။ (တစ္ခါတစ္ရံေတာ့ လိုအပ္ပါသည္။ mptnet ပဲ ထည့္ေပးပါ)
password _ မလိုပါ။ ( တစ္ခါတစ္ရံေတာ့ လိုအပ္ပါသည္။ 123 or 12345 ထည့္ေပးပါ)
ွServer _ မလိုပါ။
MMSC _ မလိုပါ။
MMS proxy_ မလိုပါ။
MMS port _ မလိုပါ။
MCC _ 414 ( ထည့္ေပးစရာမလုိပါ။ APN ကို mptnet ထည့္တာနွင့္ အလိုအေလ်ာက္ တက္ပါမည္)
MNC _ 01 ( သူလည္း APN ထည့္တာနွင့္ အလိုအေလ်ာက္တက္ပါသည္)
Authentication type _ (PAP or CHAP) or ( CHAP)
APN type_ပံုမွန္အားၿဖင့္ ထည့္စရာမလိုပါ။ ( Samsung မ်ားတြင္ internet +mms ကို ေရြးေပးရပါမည္။)
**********************************************************************************
ခ်ိန္ပုံခ်ိန္နည္းမွာ ဖုန္းတို္င္း မတူနူိင္ပါ။ အရင္ဆံုး ခ်ိန္မည္ ဆိုပါက Data Switch ကို ဖြင့္ေပးထားၿပီး Name,APN နွစ္မ်ိဳးသာထည့္၍ Save လုပ္ပါ။
အမ်ားစုမွာ ၄င္းအတိုင္းတြင္ လိုင္းတက္ပါသည္။ မတက္လွ်င္ Authentication type ကို ထည့္ေပးရပါမည္။
အမ်ားစုမွာ PAP or CHAP နွင့္ တက္ပါသည္။ samsaung >2.3.6 အမ်ားစုတြင္ေတာ့ CHAP ကိုသာ လက္ခံပါသည္။
မတက္လာေသးလွ်င္ username ထည့္ၾကည့္ပါ။
ထိုမွ မတက္လာေသးလွ်င္ေတာ့ password ကို ထည့္ၾကည့္ရပါမယ္။

**********************************************************************************
CDMA 800 Internet setting ခ်ိန္နည္း။

Name _နွစ္သက္ရာ ထည့္နူိင္သည္။
APN   _#777
Proxy _မလိုပါ။
Port   _မလိုပါ။(တစ္ခါတစ္ရံတြင္ေတာ့ 80 ကို ထည့္ေပးပါ)
Username_anyname@c800.mm
Password _ပံုမွန္အားၿဖင့္ မလုိပါ။( 123 or 12345)
Server_မလိုပါ။
MMSC_မလိုပါ။
MMS Proxy_မလိုပါ။
MMS port_မလိုပါ။
MCC_default အေနၿဖင့္ တက္ပါသည္။
MNC_default အေနၿဖင့္ တက္ပါသည္။
Authentication type_PAP or CHAP (or) CHAP
APN type_ပံုမွန္ဆို ထည့္စရာမလိုပါ။ (လိုခဲ့ေသာ္ default ဟုသာ ထည့္ေပးပါ)
Data bearer_မလိုပါ။
Prompt password_ #777
**********************************************************************************
ဖုန္းအလံုးတုိင္း မတူညီနူိင္လို႔ စတင္ ခ်ိန္မည္ ဆိုပါက Data enable ကို on ထားပါမယ္။ ထိုေနာက္ Wireless and network settings>Mobile networks>Access Point Names ကို ၀င္ပါမယ္။
menu key ( မ်ဥ္းေလးေၾကာင္းထပ္ ပံုကေလးေပါ့) ကို နွိပ္ၿပီး New APN ကို ေရြးပါမယ္။ ထို႔ေနာက္ Name, APN, usernameနွင့္ Prompt password ကိုသာ ထည့္၍ Save လုပ္ပါ။ Restart ခ်ေပးပါ။
ၿပန္တက္လာလွ်င္ အင္တာနက္သံုး၍ ရပါၿပီ။ အကယ္၍ မရေသးလွ်င္ password, Authentication type တို႔ကို ထည့္ေပးၿပီး restart ထပ္ခ်ေပးပါ။ ထိုအထိ တက္မလာေသးလွ်င္ေတာ့ port နွင့္ APN type ကို ထည့္ေပးလိုက္ပါ။

**********************************************************************************
ယခု ထြက္ရွိေသာ 1500 တန္ CDMA 800 ဖုန္းမ်ားအတြက္ Internet Setting ခ်ိန္နည္းေလးပါ။

Name _ Mectel (or) Card
APN   _ #777
Proxy _ မလိုပါ။
Port   _ မလိုပါ။
Username _ mectel@c800.mm (or) card@c800.mm
password  _ 123 (or) 12345 (or) card
Server_ မလိုပါ။
MMSC _ မလိုပါ။
MMS proxy_မလိုပါ။
MMS port_မလိုပါ။
MCC_460
MNC_03
Authentication type_PAP or CHAP (or) CHAP
APN type_ပံုမွန္အားၿဖင့္ မလုိပါဘူး။ ( default ကိုသာ ထည့္ေပးပါမယ္။)
Data bearer_ မလိုပါ။
Prompt password_#777
APN မပါေသာ သူမ်ားကေတာ့ PPP Digit မွာ #777 ထည့္ပါမယ္။
Connection name ေတာင္းခဲ့ရင္ mectel ပါေနာ္။
**********************************************************************************
ဒါကို pdf အေနနဲ႔ လိုခ်င္ရင္ Download
Notepad ေလးနဲ႔ သေဘာက်တယ္ ဆိုရင္ Download
**********************************************************************************

Power ISO 5.6 Full Version ( 6 MB )

/

CD/DVD လုပ္ငန္းလုပ္ကိုင္ေနသူမ်ားအတြက္ CD/DVD ဖိုင္မ်ားကို Edit လုပ္ေပးႏိုင္တဲ့ Software ေကာင္း
ေလးတစ္ခုျဖစ္ပါတယ္..CD/DVD ဖိုင္မ်ားရဲ႕ Extension ျဖစ္တဲ့ .iso , .nrg စတဲ့ ဖိုင္မ်ားကို Extract , Compress လုပ္ထားခ်င္သူမ်ား..မိမိရဲ႕ CD/DVD ဖိုင္မ်ားကို Passwords နဲ႕ပိတ္ထားခ်င္သူမ်ား စသည့္
CD/DVD ႏွင့္သက္ဆိုင္ေသာ လုပ္ငန္းမ်ားတြင္မ်ားစြာအက်ိဳးျပဳပါတယ္..အေသးစိတ္အခ်က္အလက္ကိုေတာ့
အာက္မွာေရးျပထားပါတယ္..လိုအပ္သူမ်ား Download ရယူႏိုင္ၾကပါၿပီ

Download Setup=> Link 1 / Link 2

Download Keygen=> Link 1 / Link 2

PowerISO is a powerful image processing and file compression tool, which allows you to create, extract, compress, edit and convert ISO/BIN image files, and mount these files with internal virtual drive. And most of all, the compressed files can be used directly without decompressing.

• Support ISO, BIN, NRG, IMG, DAA, ...
• Open, Create, Edit, Extract ISO File...
• Compress, Encrypt, Split ISO File...
• Integrated with internal Virtual Drive...

Main Features:
• Support almost all CD/DVD-ROM image file formats (ISO, BIN, NRG, IMG, DAA and so on).
Note: DAA (Direct-Access-Archive) is an advanced format for image file, which supports some advanced features, such as compression, password protection, and splitting to multiple volumes. It can be handled directly just like other formats, such as ISO, BIN, ...
• Supports on-the-fly burning.
• Supports UDF image file.
• Create image file from hard disk files or CD/DVD-ROM.
• Edit an existing image file.
• Can edit and burn Audio CD image file.
• Extract files and folders from image file.
• Convert image files between ISO/BIN and other formats.
• Make bootable image file, get boot information from bootable image file.
• Make floppy disk image file.
• Optimize files to save disk space while saving image files.
• Mount image file with internal virtual drive. Even if the image file is saved as DAA format, the virtual drive can handle that format directly.
• Support shell integration, such as context menu, Drag and Drop, clipboard...
• Supports command-line parameters.
• Can open XBOX image file.
• Supports multiple languages

New Features in v5.6:
• Support burning to multiple drives simultaneously.
• Support simulation burning.
• Support viewing drive and disk information.
• Support searching within image file.
• Some minor bug fixes and enhancements.


System requirement:
•Windows 98 / Window Me / Windows 2000 / Windows XP / Windows 2003 / Windows Vista / Windows 7 / Windows 8 operating system or above.
•Intel Pentium 166MHz or above.
•64MB memory.
•At least 10MB hard disk space.

Language : English, Arabic, Armenian, Belarusian, Bosnian, Bulgarian, Chinese Simplified, Chinese Traditional, Croatian, Czech, Danish, Dutch, Farsi, French, German, Greek, Hungarian, Italian, Japanese, Korean, Lithuanian, Malay, Norsk, Polish, Portuguese, Russian, Serbian, Slovak, Slovenian, Spanish, Swedish, Thai, Turkish, Ukrainian, Vietnamese, Kazakh

အင္တာနက္ ဂ်ာနယ္ အတြဲ (၁၄) အမွတ္ (၂၀) (28.5.13)

/
အင္တာနက္ဂ်ာနယ္ကိုအပတ္စဥ္တနလၤာတိုင္းတင္ေပးသြားမွာျဖစ္ပါတယ္ဗ်ာ။အင္တာနက္ဂ်ာနယ္ ကိုဖတ္ခ်င္သူမ်ားအတြက္မူရင္းဆိုဒ္က ေနေဒါင္းလုပ္လင္႕ကိုတင္ေပးလိုက္တာပါ။ အင္တာနက္ဂ်ာနယ္
၀ယ္ဖတ္စရာမလိုေတာ႕ဘူးေပါ႕။ အခုအပတ္မွာ အင္တာနက္ ဂ်ာနယ္ အတြဲ (၁၄) အမွတ္ (၂၀)ကို တင္ေပး
လိုက္ပါတယ္ဗ်ာ။ ဒီေန႕ 28 ရက္ေန႕ထြက္ Update ေလးပါ ။
**  Step-1.ေအာက္က Download Button ကိုႏွိပ္လိုက္ပါ  
**  Step-2. "5sec". ေလာက္ေစာင္႕ေပးပါ။
**  Step-3. "  << SKIP AD >>   ".ကိုႏွိပ္ေပးပါ။
**  Step-4. Download Link က်လာပါလိမ္႕မယ္။
**  အဆင္ေျပပါေစဗ်ာ။


Internet Download Manager 6.15 Build 14.1 Full

/

Internet Download Manager 6.15 Build 14.1 ထြက္လာျပန္ပါၿပီ.. လိုခ်င္သူမ်ားအတြက္ Update ျဖစ္ေအာင္ တင္ေပးလိုက္ပါတယ္.  Patch ခ်ဳိးတာကေတာ့ အရင္လိုပဲ. Setup ကို Install လုပ္ပါ.. ၿပီးရင္ ကြန္ပ်ဴတာရဲ႕ ညာဘက္ေအာက္ေထာင့္နားက IDM icom ကိုညာကလစ္ေထာက္ၿပီး Exit ကိုႏွိပ္ပါ.. Patch ဖိုင္တစ္ခုကို Double Click ႏွိပ္ပါ.. Patch ကိုႏွိပ္ပါ.. ဒါဆို ၿပီးပါၿပီ... တကယ္လို႔ Upgrade လုပ္လို႔မရတာ. IDM အေဟာင္းကို ျဖဳတ္ခ်င္လို႔ ျဖဳတ္လို႔မရတာဆိုရင္ ဒီမွာ ၾကည့္ပါ.. ခု ဗားရွင္းက အေဟာင္းကို ျဖဳတ္စရာမလိုပါ....

Setup Download : 4.78 MB

Patch Download : 

IDM နဲ႔ ေဒါင္းလို႔မရတဲ့ျပသနာႏွင့္ IDM ကိုအျပည့္အစံုျဖဳတ္နည္း

/


IDM ကိုျဖဳတ္ရင္ အၿပီးအျပည့္အစံုျဖဳတ္ဖို႔လိုပါတယ္..ကဲ IDM ကို ျဖဳတ္နည္းအရင္ၾကည့္ရေအာင္..

1.ကြန္ပ်ဴတာရဲ႕ ညာဘက္ေအာက္ေထာင့္က Tray ထဲမွာ IDM icon ကို ညာကလစ္ေထာက္ၿပီး exit ကိုႏွိပ္ပါ..


2.Ctrl+Alt+Delete (or) Taskbar ကိုညာကလစ္ေထာက္ၿပီး Task Manager ကိုေခၚပါ.. အဲဒီထဲက IDMan.exe ကိုကလစ္တစ္ခ်က္ေထာက္ၿပီး End Process ကိုႏွိပ္လိုက္ပါ..  


3. Start>Control Panel > Add or Remove Program ကို အဆင့္ဆင့္သြားၿပီး Internet Download Manager ကိုေရြးကာ Change/Remove ကိုေရြးပါ.. ထပ္ေပၚတာတဲ့ေဘာက္မွာ Complete Uninstall ကိုေရြးၿပီး Next ကိုႏွိပ္ကာ အဆင့္အဆင့္ျဖဳတ္လိုက္ပါ..


4. ၿပီးရင္ Browser ေတြမွာ လိုက္ျဖဳတ္ရပါအံုးမယ္.. Firefox သံုးတယ္ဆိုရင္ေတာ့ အေပၚက Tools > Add-ons ကိုႏွိပ္ပါ.. ေပၚလာတဲ့ေဘာက္မွာ Extensions ကိုတစ္ခ်က္ႏွိပ္ၿပီး IDM CC ဆိုတာရဲ႕ေဘးက Uninstall ကိုႏွိပ္ပါ..


5. ေအာက္မွာေပးထားတဲ့လင့္က ေဆာ့၀ဲကို ေဒါင္းၿပီး စက္မွာ Install လုပ္လိုက္ပါ..
Download SpecialUninstaller

6.ၿပီးရင္ အဲဒီေကာင္ကို Run လိုက္ပါ.. ေပၚလာတဲ့ေဘာက္ထဲမွာ Internet Download Manager ကိုေရြးၿပီး ေဆာ့၀ဲရဲ႕ညာဘက္ေအာက္ေထာင့္နားက Run Uninstaller ဆိုတဲ့ ေငြေရာင္ Button ကိုႏွိပ္လိုက္ပါ..


က်န္တာေတာ့ မေျပာေတာ့ဘူးဗ်ာ.. ပံုေတြကို ၾကည့္ၿပီးလုပ္လိုက္ရင္ ရပါၿပီ...


 ကဲအခုဆိုရင္ေတာ့ IDM ဟာ ကိုယ့္စက္ထဲမွာ အျမစ္ေတာင္မက်န္ေတာ့ပါဘူး.. ၿပီးရင္ေတာ့ CCleaner တို႔လို ေဆာ့၀ဲနဲ႔ စက္ကို သန္႔ရွင္းေရးေလးဘာေလးလုပ္လိုက္.. ၿပီးရင္ Restart ခ်လိုက္.. ျပန္တက္လာေတာ့ IDM ကို ျပန္ၿပီး Install လုပ္လိုက္.. ဒါဆိုရင္ေတာ့ အျပည့္အ၀ အလုပ္လုပ္ပါၿပီ.. ဒါမွ အဆင္မေျပရင္ေတာ့ ကိုယ္ေဒါင္းတဲ့ လင့္ရဲ႕ Server ေၾကာင့္ပဲျဖစ္ပါလိမ့္မယ္..

VMware Workstation 9.0.2 Full

/
VMware Workstation ဆိုတာ Windows နဲ႔ အျခား OS ေတြကို တင္ၿပီးသံုးစြဲလို႔ရတဲ့အတြက္ လူသံုးမ်ားတဲ့ Software ျဖစ္ပါတယ္.. အရင္ကလည္း ဗားရွင္းအသစ္ထြက္တိုင္း တင္ျဖစ္ပါတယ္.. ခု ဗားရွင္း 9.0.2 ထြက္လာလို႔ တင္ေပးလိုက္ပါတယ္..

System requirements ေတြကေတာ့.
64-bit x86 Intel Core™ Solo Processor or equivalent, AMD Athlon™ 64 FX Dual Core Processor or equivalent
1.3GHz or faster core speed
2GB RAM minimum/ 4GB RAM recommended ျဖစ္ၿပီး တင္ႏိုင္တဲ့ OS ေတြကေတာ့-

  • Windows 8
  • Windows 7
  • Windows Vista
  • Windows XP SP3
  • Windows Server 2012
  • Windows Server 2008
  • Windows Server 2003 Standard
  • Windows XP Home Edition with SP2
  • Ubuntu 8.04 and above
  • Red Hat Enterprise Linux 4.5 and above
  • CentOS 5.0 and above
  • Oracle Linux 5.0 and above
  • openSUSE 10.2 and above
  • SUSE Linux 10 and above ေတြပဲျဖစ္ပါတယ္..

Setup Download Via Dev-Host : 

Keygen Download :

  • Dev-Host

  • Zippyshare

  • Solidfiles 


    ** Step-1- Download Button ကိုႏွိပ္လိုက္ပါ။
    ** Step-2- " 5sec". ေလာက္ေစာင္႕ေပးပါ။
    ** Step-3- " << SKIP AD >> ".ကိုႏွိပ္ေပးပါ။

    ** Step-4- Download Link က်လာပါလိမ္႕မယ္။
    ** Step-5- Download လုပ္လို့ပါရျပီ။