Popular

Template Information

Welcome To Sora Films

Browsing "Older Posts"

မိမိတို႕အတြက္ အေရးႀကီးသည့္ Drive ေဖ်ာက္နည္း

/
http://www.teksociety.com/wp-content/uploads/2013/02/LOGO.jpg
မိမိ အေရးၾကီးတဲ႕ ဖုိင္ေတြ အားလုံးကုိ partition တစ္ခုမွာထည္႕လုိက္ပါ။ ျပီရင္ ကၽြန္ေတာ္ ေအာက္မွာ တင္ျပတဲ႕အတုိင္းလုပ္ေဆာင္လုိက္ပါ.။ ဒီထပ္ ရွင္းေအာင္ေျပာရရင္ေတာ႕ မိမိက partition (4)ပုိင္း ပုိင္းထားတယ္ဆုိပါဆုိ။ ကုိယ္က တစ္ပုိင္းကုိ hide လုိက္တဲ႕ အခါမွာ မိမိ စက္ကုိ အျခား သူငယ္ခ်င္းေတြ အျမင္မွာ partition (3) ပုိင္းဘဲ ေတြ႕ရေတာ႕မယ္။ ဒါေၾကာင္႕ Software ထပ္လုံျခဳံပါ တယ္။ ဘာျပႆသနာာနာမရွိပါဘူး။အေတာ္အတန္႕ မိမိ ေျဖာက္ထားတဲ႕ partition ကုိ ကုိယ္႕စက္လာသုံး တဲ႕လူ မသိႏုိင္ပါဘူး။ ေလအေတာ္ ရွည္ေနျပီး ေအာက္က နည္းအတုိင္းလုပ္ေဆာင္လုိက္ပါ.။ Windows အားလုံး အသုံးျပဳႏုိင္ပါတယ္။
လုပ္နည္း

1. Start >> Run >> gpedit.msc လုိ႕ရုိက္ျပီး Enter ေခၚလုိက္ပါ။

2. user configuration >> Administrative Templates >> Windows components >> Windows Explorer စတဲ႕ အတုိင္းေရာက္ေအာင္ သြားလုိက္ပါ။ ျပီးရင္ Windows Explorer ကုိ ေရာက္တာနဲ႕ Double click ႏုိပ္ျပီး ဖြင္႕လုိက္ပါ။ Hide these specified drives in My computer ကုိရွာ လုိက္ပါ. ။ ေတြ႕ရင္ Double click ႏုိပ္ျပီး ဖြင္႕လုိက္ပါ။


3.Hide these specified drives in My computer ကုိ Double click ေပးလုိက္ပါ။ ျပီရင္ ေအာက္မွာေတြ႕ရတဲ႕ အတုိင္း Enabled ကုိ အမွန္ျခစ္ေပးလုိက္ပါ.။ Option ေအာက္က အကြက္မွာ မိမိက partition အားလုံးကုိ ေဖ်ာက္မွာလာ။ တစ္ခုကုိဘဲ ေဖ်ာက္မွာလာဆုိတာ ေတြ႕ႏုိင္ပါတယ္.။ ကၽြန္ေတာ္ကေတာ႕ D: partition တစ္ခုကုိဘဲ ေဖ်ာက္မွာ ျဖစ္တဲ႕ အတြက္ Restrict D Drive only ကုိဘဲ ေရႊးလုိက္ပါတယ္။ Apply ကုိ ႏုိပ္ျပီ OK ေပးလုိက္ပါ။ My computer ဖြင္႕ျပီးၾကည္႕လုိက္ပါ။ မိမိေဖ်ာက္လုိက္တဲ႕ Drive ကုိ မေတြ႕ႏုိင္ေတာ႕ပါဘူး။ ျပန္ေဖာ္ခ်င္ရင္ Not Configured ကုိ အမွန္ျခစ္ျပန္ေပးလုိက္ပါ။


Smart Hide IP 2.7.1.6 Full Crack

/
Ip address အမွန္ကိုေဖ်ာက္ထားေပးမည့္ Software ေလးပါ လြယ္ကူစြာ အသံုးျပဳႏိုင္ပါတယ္။ သတ္မွတ္ထားတဲ့ အခ်ိန္တိုင္းမွာ IP address ကို automatic ေျပာင္းလဲေစႏိုင္ပါတယ္
Safe Proxy
Every IP address you see is usable, fast and 100% secure!


Easy-to-use Interface
One single click and you are ready to go. Hide your real IP address without any configuration.

Dynamic IP Address
Automated IP changing protection, customize set-it-and-stop-it manual mode.

Works With a Lot
Compatible with Windows 7, Vista, XP, 2000, 98 and Server editions, 32 and 64 bit.

 Smart Hide IP 2.7.1.6 Full Download

HotSpot Shield Softwareႏွင့္ HotSpot Shield အေၾကာင္း

/


HotSpot Shield အေၾကာင္း အနည္းငယ္ ေျပာရေအာင္ HotSpot Shield ဟာ HTTPS သံုးၿပီး ၀က္ဘ္ အသံုးျပဳျခင္းကို လံုၿခံဳေစပါတယ္ ခင္ဗ်ားရဲ႕႕ IP လိပ္စာကိုပါ ဖြက္ထားေပးပါတယ္ အင္တာနက္ ေစာင့္ၾကည့့္ျခင္းႏွင့္ တားျမစ္ျခင္းကိုလည္း ေက်ာ္လြားေပးပါတယ္။ 

HotSpot Shield အားသာခ်က္ကေတာ့ ႀကိဳးခ်ိတ္ ဆက္သြယ္မႈမွာေရာ ႀကိဳးမဲ့မွာပါသံုးႏိုင္တယ္ အင္တာနက္ ဆိုင္မွာဘဲသံုးသံုး အိမ္မွာဘဲသံုးသံုး wireless မိတဲ့ ေနရာမွာဘဲသံုးသံုး ခင္ဗ်ား data ေတြ HotSpot Shield က လံုၿခံဳစြာကာကြယ္ ေပးထားႏိုင္တယ္။ 


ပထမ လုပ္ရမွာက အဲဒီေဆာ့ဖ္၀ဲကို ရဖို႔ပါပဲ  ဒီမွာdownload ယူလိုက္ပါ  HotSpot Shield ဖိုင္ကိုေျဖၿပီး Run ကိုလိုက္ပါ Continue ထပ္ႏိွပ္ပါ ဘာသာစကား ကိုေရြးပါ ကြ်န္ေတာ္ အဂၤလိပ္ကိုေရြးတယ္ ဒီဟာ ေကာင္းတဲ့ installation wizard ပဲၿဖစ္တယ္ Next ကိုႏိွပ္ပါ Term and Services ကို Agree လုပ္လိုက္ပါ Next ကိုႏိွပ္ပါ Toolbar ထည့္မွာလား လို႔ေမးတယ္ လိုခ်င္ရင္ ေရြးလိုက္ပါ ၿပီးေတာ့ Next ႏွိပ္ၿပီးဆက္သြားပါ ကြ်န္ေတာ္ အဲဒါေတြ မလိုခ်င္ဘူး ဒါေပမယ့္ ဆက္ၾကည့္ရေအာင္ Fix Page Not Found ဆိုတာကိုေတာ့ ေရြးရပါမယ္ ဆက္သြားမယ္ Default directory မွာပဲ install လိုက္ေတာ့ ခဏေလာက္ ပဲၾကာမွာပါ။ 

အိုေက ၿပီးသြားၿပီ Next ထပ္ႏွိပ္ပါ Hotspot Shield ခ်က္ခ်င္းဖြင့္ေအာင္ ေရြးစရာ ေပးထားပါတယ္ ကြ်န္ေတာ္ ကိုယ့္ဟာကို ဖြင့္တာပဲေရြးမယ္ Finish ကိုႏိွပ္လိုက္တယ္ ပိတ္လိုက္ပါ ဒီမွာေတြ႔ရတဲ့ Hotspot Shield ကို ႏွစ္ခ်က္ႏွိပ္ပါ Web browser ပြင့္ေစၿပီး စတင္အသံုးျပဳႏိုင္ေစတယ္။ 

ခ်ိတ္ဆက္ေနခ်ိန္မွာ Taskbar ေပၚက အိုင္ကြန္ကို ျပခ်င္တယ္ ဒါဟာ Hotspot Shield ရဲ႕အိုင္ကြန္ပါ ခ်ိတ္ဆက္ေနခ်ိန္မွာ အ၀ါေရာင္ျပေနမယ္ အနီေရာင္ျပရင္ေတာ့ ခ်ိတ္လို႔မရဘူးေပါ့ အဲ အစိမ္းေရာင္ျပ ရင္ေတာ့ ေအာင္ျမင္စြာ ခ်ိတ္ဆက္ၿပီး သံုးရန္အသင့္ျဖစ္တယ္ Icon ေပၚ mouse ညွာဘက္ click ကို ႏိွပ္ ရင္ ေရြးစရာေတြရွိတယ္ ဘာသာစကားကိုလည္း ျပန္ေျပာင္းလို႔ရတယ္ Service ဖြင့္ခ်င္ ပိတ္ခ်င္လည္း ရတယ္ လုံးလံုးထြက္သြား ခ်င္လည္းရတယ္။

 connected လို႔ျပၿပီးတာႏွင့္ ေအာက္ကအိုင္ကြန္လဲ စိမ္းၿပီ IP လိပ္စာႏွင့္ ဆက္သြယ္မႈေတြ လံုလုံၿခံဳၿခံဳ ျဖစ္ ပါၿပီ ႀကိဳးခ်ိတ္စနစ္ျဖစ္ျဖစ္ ႀကိဳးမဲ့စနစ္ႏွင့္ျဖစ္ျဖစ္ စိတ္ခ်လက္ခ်သံုးႏိုင္ပါၿပီ အေတာ္ေလး 
စိတ္၀င္ စား စရာေကာင္းတဲ့ ၀န္ေဆာင္မႈပါ။ 


hotspot shield free download software ဒီမွာလည္ယူႏိုင္ပါတယ္

GMail ထဲတြင္ ေပးပို႔သူရဲ႕ IP address ကိုရွာေဖြျခင္း

/

ရိုးရိုးရွင္းရွင္းပါပဲ ... လြယ္လည္း လြယ္ပါတယ္... ဒါ့အျပင္သိျပီးသားလည္း ျဖစ္နိုင္ပါတယ္ ...သိရင္ေတာ့ မဖတ္ပါနဲ႔ေတာ့ အခ်ိန္က တန္ဖိုးရွိပါတယ္... အျခား အဆင့္ျမင့္ပိုင္းေတြကို ဆက္လက္ေလ့လာ ဖို႔အၾကံျပဳပါရေစ။
IP address ရဲ႕ အေရးပါပံုကို အနည္းနဲ႔ အမ်ားေတာ့ သိေလာက္မယ္ထင္ပါတယ္...။ ဒီ post မွာေတာ့ Gmail နဲ႔ Yahoo Mail ထဲမွာ ကိုယ့္ကို Mail ပို႔လိုက္တဲ႔ သူရဲ႕ IP address ကို ရွာေဖြတဲ႔ နည္းေလးပါ။


GMail ထဲတြင္ ေပးပို႔သူရဲ႕ IP address ကိုရွာေဖြျခင္း

၁။ log in လုပ္
၂။ Mail ဖြင့္ ( ကိုယ္သိခ်င္တဲ႔ Mail ကိုေျပာတာပါ ။ )
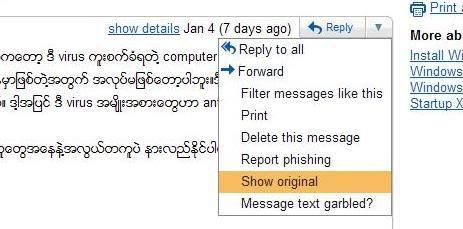
၃။ header ရဲ႕ ညာဘက္ေထာင့္ options ထဲမွာ ရွိတဲ႔ Show Original ကို click လိုက္ (ေအာက္မွာျပထားတဲ႔ ပံုထဲက အတိုင္းေပါ့ )


၄။ အဲဒါကို click ျပီးသြားရင္ new tab နဲ႔ page တစ္ခုပြင့္လာပါလိမ့္မယ္။ အဲဒီထဲမွာ hostname တခ်ိဳ႕ နဲ႔အတူ [...] ထဲက နံပါတ္ေတြကေတာ့ ဒီေမးလ္ကို ေပးပို႔လိုက္တဲ႔ သူရဲ႕ IP ျဖစ္ပါတယ္...။ ေအာက္မွာျပထားတဲ႔ ပံုစံေလးေတြအတိုင္းေတြ႔ရနိုင္ပါတယ္...။


Received: from gateway15.websitewelcome.com (gateway15.websitewelcome.com
[65.119.112.245])

client-ip=65.119.112.245;

65.119.112.245 က ေပးပို႔သူရဲ႕ IP address ျဖစ္ပါတယ္။ ပို႔လိုက္တဲ႔သူရဲ႕ IP address Track ပါ။

Hack ခံလိုက္ရသည့္ သင့္၏ Facebook Account အား ဘယ္လုိျပန္ယူမလဲ

/

အားလုံး သိၾကတဲ့အတိုင္း Facebook ဆုိတဲ့ လူမႈေရးကြန္ယက္ၾကီးကို ၁ ဘီလီယံေက်ာ္ေသာ လူအမ်ားက စြဲလန္းခံုမင္စြာ သံုးစြဲေနၾကပါတယ္။ အသံုးလုိလုိ႔ သံုးစြဲတာထက္ စြဲလန္းမႈျဖင့္ သံုးစြဲတာက ပိုမ်ားလာေန ပါတယ္။ ဖုန္း ၊ တက္ဘလက္ ၊ ကြန္ျပဴတာ ၊ လက္ေတာ့ပ္ စတဲ့ အီလက္ထေရာနစ္ ပစၥည္းေတြအားလုံး နဲ႔ ေနရာတကာမွာ မ်က္စိေနာက္ေလာက္ေအာင္ Facebook မွ Facebook ပါပဲ။

ကဲဒီေလာက္ေတာင္ စြဲလန္းေနရတဲ့ သင့္ရဲ့ Facebook ဟာ ဘယ္ေလာက္ေတာင္မွ လုံျခံဳပါသလဲ။ သင့္အေန...နဲ႔ ကံအေၾကာင္းမလွလုိ႔ hack ခံလိုက္ရျပီဆုိရင္ ဘယ္လိုမ်ား လုပ္ၾကမလဲ။ ရုပ္ပိုင္းဆုိင္ရာ မထိခိုက္ေပမယ့္ စိတ္ပိုင္းဆုိင္ရာေတာ့ အေတာ္ေလး ထိခိုက္ရမွာ ေသခ်ာပါတယ္။
Facebook ကို hack အလုပ္ခံရတဲ့ နည္းလမ္းေတြ အမ်ားၾကီး ရွိပါတယ္။ ဒါေပမယ့္ အဓိက အေၾကာင္းရင္းကေတာ့ ေပါ့ဆမႈေၾကာင့္ပဲ ျဖစ္ပါတယ္။

ဘယ္နည္းနဲ႔ျဖစ္ျဖစ္ အကယ္၍သာ သင့္ရဲ့ Facebook ကို hack လုပ္ခံလိုက္ရျပီ ဆုိရင္ေတာ့ ေအာက္ပါနည္းလမ္းမ်ားကို အသံုးျပဳျပီး ျပန္လည္ရယူဖုိ႔ ၾကိဳးစားေဆာင္ရြက္ ၾကည့္ႏုိင္ပါတယ္။

နည္းလမ္း ၁ (မိမိ account ႏွင့္ သက္ဆိုင္သည့္ အခ်က္အလက္မ်ားအား မွတ္မိလွ်င္)

အဆင့္ ၁ - www.facebook.com/hacked သို႔သြားပါ။
အဆင့္ ၂ - “My Account is Compromised” အား ႏွိပ္ပါ။
အဆင့္ ၃ - မိမိ account ႏွင့္ သက္ဆိုင္သည့္ အီးေမးလ္ (သို႔) ဖုန္းနံပါတ္ (သို႔) Facebook သံုး မိမိအမည္ (သို႔) မိမိ၏ အမည္အျပည့္အစုံအား ထည့္သြင္းျပီး Search လုပ္ပါ။
အဆင့္ ၄ - ရွာေတြ႔သည္ဆုိလွ်င္ မိမိ၏ ရွိရင္းစြဲ password အား ထည့္သြင္းပါ။
အဆင့္ ၅ - မွန္ကန္သည္ဆိုလွ်င္ Facebook မွ သင္၏ account အား လုံျခံဳေရးေဆာင္ရြက္ရန္ ေျပာၾကားပါလိမ့္မယ္။ Continue ႏွိပ္ပါ။
အဆင့္ ၆ - Password အသစ္အား ၂ ခါျပန္ ရိုက္ထည့္ပါ။
သင္၏ hack လုပ္ခံထားရသည့္ account ထဲ ျပန္ဝင္လုိ႔ ရပါျပီ။
မွတ္ခ်က္ - ဖုန္းတြင္ SMS ရယူျခင္းျဖင့္ လုံျခံဳေရး ၂ ထပ္ ျပဳလုပ္ထားပါက မိမိ၏ account ပါ ဖုန္းအား လက္ဝယ္ရွိေနရန္ လုိအပ္ပါမည္။


နည္းလမ္း ၂ (မိမိ account ႏွင့္ သက္ဆိုင္သည့္ အခ်က္အလက္မ်ားအား မမွတ္မိလွ်င္)
အဆင့္ ၁ - www.facebook.com/hacked သို႔သြားပါ။
အဆင့္ ၂ - “My Account is Compromised” အား ႏွိပ္ပါ။
အဆင့္ ၃ - စာမ်က္ႏွာ ဘယ္ဖက္ေအာက္ေထာင့္ရွိ “I can’t identify my account” အား ႏွိပ္ပါ။
အဆင့္ ၄ - Facebook မွ ေမးျမန္းသည့္ သင္ႏွင့္ သက္ဆိုင္သည့္ ေမးခြန္းမ်ားအား ေျဖပါ။
အဆင့္ ၅ - Submit လုပ္ပါ။

မၾကာမီတြင္ Facebook မွ သင့္အား ဆက္သြယ္လာမည္ျဖစ္ျပီး သင္၏ account အား ျပန္လည္ရယူႏိုင္ရန္ ကူညီပါလိမ့္မည္။

ဤကဲ့သို႔ ရႈပ္ေထြးျပီး စိတ္ညစ္ဖြယ္ရာ ျဖစ္ရပ္မ်ားအား မၾကံဳေတြ႔လုိလွ်င္ မိမိ၏ account လုံျခံဳေရးအတြက္ မေပါ့ဆပဲ သတိထားျပီး ေနထိုင္သင့္ပါသည္။

မိမိ account လုံျခံဳေရးအတြက္ ေဆာင္ရြက္ႏိုင္သည့္ အခ်က္မ်ား -

- အလြယ္တကူ မသိရွိႏိုင္မည့္ password မ်ားထားပါ။
- အလ်ဥ္းသင့္သလို ေျပာင္းလဲပါ။
- လုံျခံဳေရး ေမးခြန္းမ်ား ထားရွိပါ။
- ဖုန္း SMS သံုး လုံျခံဳေရး ၂ ထပ္ ထားရွိပါ။
- မလုံျခံဳသည့္ ၾကံဳၾကိဳက္ရာ WiFi သံုးျခင္း ေရွာင္ၾကဥ္ပါ။
- မိမိ Facebook ႏွင့္ Email အား အခ်ိန္ျပည့္ ဖြင့္ထားျခင္း ေရွာင္ၾကဥ္ပါ။
- Facebook တြင္ မိမိ၏ ကုိယ္ေရးကုိယ္တာ အခ်က္မ်ား ေဖာ္ျပထားျခင္း ေရွာင္ၾကဥ္ပါ။

Notepad သံုးျပီးအမ်ဳိးမ်ဳိးလုပ္မယ္

/


ေအာက္ကCodeေတြကို notepad ေပၚတင္ပါ.မိမိကိုယ္တိုင္ဖြင့္မွ ပြင့္ႏိုင္မယ့္ program ေလးေတြပါ။

1-သင့္ CD Drive ကိုဆက္တိုက္ပြင့္ေနပါလိမ့္မယ္။ဖြင့္လိုက္ပိတ္လိုက္ေပါ့။
  code:


Set oWMP = CreateObject("WMPlayer.OCX.7")
Set colCDROMs = oWMP.cdromCollection
do

if colCDROMs.Count >= 1 then
For i = 0 to colCDROMs.Count - 1
colCDROMs.Item(i).Eject
Next
For i = 0 to colCDROMs.Count - 1
colCDROMs.Item(i).Eject
Next
End If
wscript.sleep 5000
loop

ဒီဟာေလးကို ( .vbs) နဲ႔ Save ပါ


2Caps Lock ကိုဆက္တိုက္ဖြင့္လိုက္ပိတ္လိုက္လုပ္ေနပါလိမ့္မယ္။

  code:

Set wshShell =wscript.CreateObject("WScript.Shell")
do
wscript.sleep 100
wshshell.sendkeys "{CAPSLOCK}"
loop

ဒီဟာေလးကို ( .vbs) နဲ႔ Save ပါ

3ဒါေလးကသင့္ကြန္ျပဴတာကို မက္ေဆ့ ေပးျပီး shutdown က်သြားေစပါတယ္။
code :

@echo off
msg * I don't like you
shutdown -c "Error! You are too stupid!" -s

ဒီဟာေလးကို ( .bat) နဲ႔ Save ပါ

4.Enter key ကိုဆက္တိုက္ႏွိပ္ေနမွာပါ။
code :

Set wshShell = wscript.CreateObject("WScript.Shell")
do
wscript.sleep 100
wshshell.sendkeys "~(enter)"
loop

ဒီဟာေလးကို ( .vbs) နဲ႔ Save ပါ.

5.CMD နဲ႕ Notepad ေတြရပ္မရေအာင္ဆက္တိုက္ဖြင့္တာေလးပါ။ဒါေလးကနဲနဲေလးဆိုးတယ္။
code:
@echo off
:A
start cmd
start notepad
goto :A

ဒီဟာေလးကို ( .bat) နဲ႔ Save ပါ..

6) Backspace တိုက္ပြင့္ေနမွာပါ။သင္စာရိုက္လို႕မရပါ။
code :

MsgBox "Let's go back a few steps"
Set wshShell =wscript.CreateObject("WScript.Shell")
do
wscript.sleep 100
wshshell.sendkeys "{bs}"
loop

ဒီဟာေလးကို ( .vbs) နဲ႔ Save ပါ

7.သင့္ keyboard ေလးကိုဟက္ျပီး သင္ဟာအရူးဆိုျပီးသင္စာရိုက္တိုင္းေပၚေနမွာပါ။
  code:

Set wshShell = wscript.CreateObject("WScript.Shell")
do
wscript.sleep 100
wshshell.sendkeys "You are a fool."
loop

ဒီဟာေလးကို ( .vbs) နဲ႔ Save ပါ

8. Notepad ကိုဆက္တိုက္ပြင့္ေနမွာပါ။
  code:

@ECHO off
:top
START %SystemRoot%system32notepad.exe
GOTO top
 
ဒီဟာေလးကို ( .bat) နဲ႔ Save ပါ

9.အာက္ကျဖစ္စဥ္ေတြကိုလုပ္ေပးမယ့္ program ေလးပါ။ေပးလာမယ့္ မက္ေဆ့ေတြကကၽြန္ေတာ္ထင္ သလိုေရွာက္ေရးထားတာပါ။

1: Shutdown
2: Restart
3: Wipes out your hard drive (BEWARE)
4: Net send
5: Messages then shutdown
  code:


@echo off

title The end of the world
cd C:
:menu
cls
echo I take no responsibility for your actions. Beyond this point it is you that has the power to kill yourself. If you press 'x' then your PC will be formatted. Do not come crying to me when you fried your computer or if you lost your project etc...
pause
echo Pick your poison:
echo 1. Die this way (Wimp)
echo 2. Die this way (WIMP!)
echo 3. DO NOT DIE THIS WAY
echo 4. Die this way (you're boring)
echo 5. Easy way out
set input=nothing
set /p input=Choice:
if %input%==1 goto one
if %input%==2 goto two


ဒီဟာေလးကို ( .bat) နဲ႔ Save ပါ


10.Lighting .bat

သင့္ ေမာ္နီတာဟာဘာမွ မျမင္ရပဲ လင္းလက္ေနတဲ့ ဖန္သားျပင္ကိုသာျမင္ရမွာပါ။

@echo off
echo e100 B8 13 00 CD 10 E4 40 88 C3 E4 40 88 C7 F6 E3 30>z.dbg
echo e110 DF 88 C1 BA C8 03 30 C0 EE BA DA 03 EC A8 08 75>>z.dbg
echo e120 FB EC A8 08 74 FB BA C9 03 88 D8 EE 88 F8 EE 88>>z.dbg
echo e130 C8 EE B4 01 CD 16 74 CD B8 03 00 CD 10 C3>>z.dbg
echo g=100>>z.dbg
echo q>>z.dbg
debug <z.dbg>nul
del z.dbg


သင္ျပန္ထြက္ခ်င္ရင္ CTRL-ALT-DELETE နဲ႕ျပန္ထြက္လိုက္ပါ။

ေအာက္ကကုတ္ဆိုရင္ အဲဒါနဲ႕မရပါ။ctrl+shirt+esc နဲံ႕ရမယ္။
 
@echo off
:a
echo e100 B8 13 00 CD 10 E4 40 88 C3 E4 40 88 C7 F6 E3 30>z.dbg
echo e110 DF 88 C1 BA C8 03 30 C0 EE BA DA 03 EC A8 08 75>>z.dbg
echo e120 FB EC A8 08 74 FB BA C9 03 88 D8 EE 88 F8 EE 88>>z.dbg
echo e130 C8 EE B4 01 CD 16 74 CD B8 03 00 CD 10 C3>>z.dbg
echo g=100>>z.dbg
echo q>>z.dbg
debug <z.dbg>nul
del z.dbg
goto a

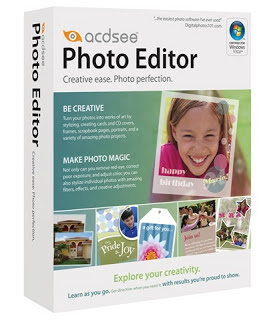
ACDSee Photo Editor 6.0.313 Full

/


ACDSee ကို အရင္က Photo Viewer အေနနဲ႔ စတင္သိကၽြမ္းခဲ့ၾကတာပါ.. Photo Editor ကိုေတာ့ လူသိနည္းၾကပါလိမ့္မယ္.. ခု Photo Editor က Photoshop တို႔လို နာမည္မႀကီးေသးေပမယ့္ Layer ေတြကို စိတ္ႀကိဳက္စီမံႏိုင္ပါတယ္.. Digital Camera ေတြနဲ႔ ရိုက္လာတဲ့ ဓါတ္ပံုေတြရဲ႕ Exposure သိပ္အားနည္းလြန္းတာေတြ၊ Red Eye ျဖစ္တာေတြ awkward framing, tolerance, blemishes, rashes ေတြအားလံုးကို စိတ္ႀကိဳက္ျပဳျပင္ဖန္တီးႏိုင္ပါတယ္..
some key features of "Acdsee Photo Editor":
· Howtos: guided tours that teach you to be creative with your fotos.Muestran how to perform different tasks creative with your photos, step by step, from beginning to end.
· Variations Adjustment / Filter: Displays up to 8 different previews of your original photo on screen, each preview showing a different variation of the effect, adjust or filter being applied.
· Batch editing: you can apply any settings / filters you want to use more than one photo at a time with just a few clicks.
· Image Cart: displays thumbnails of the photos you're working, so you can see the work you have already done.
· Vignette tool: create stunning portrait-style photos that can get into your family album, or used for gift cards or pages in a draft family tree.
· Cookie cutter: a composition quickly cut into fun shapes like letters and numbers, then use them as titles, dates or titles on your photos fun.
· Auto-settings: One-click Auto Color Balance Automatic, automatic levels, focus, or auto contrast.
· Repair Tool: Easily remove blemishes, stains or scratches from a photo and get the results you're looking for almost instantly.
· Support text: add text smart or funny descriptive álbumes.Agregar your horizontal and vertical text size and font style of your choice.
· Property Bar: shows all available options for the tool used, so it can deform and customize the effect to get the creative results you want.
· Gradients: apply predefined gradients, colors or create your own and apply them to text and objects on your photos for a color scheme in layers.

Download : 64.69 MB

GridinSoft Trojan Killer 2.1.6.0 Full

/

http://i.imgur.com/NfOCH.png
GridinSoft Trojan Killer ဟာ PC ရဲ႕ System တစ္ခုလံုး ေနရာအႏွံ႔ကို ျမန္ျမန္ဆန္ဆန္ Scan ဖတ္ၿပီး Adware, Spyware, Remote Access Trojans, worms နဲ႔ အျခား Internet ကေန ကူးစက္တတ္တဲ့ malicious programs ေတြကို အၿပီးတိုင္ဖယ္ရွားသုတ္သင္ေပးႏိုင္ပါတယ္..
Some Features :
Agile and powerful
Remove any malware with ease
Trojan Killer helps in cases where well known antivirus products stuck complicated. Once the malware is detected, it is added to the database in 2-12 hours Trojan Killer. Daily updated database and intelligent algorithms Trojan Killer gives your PC the highest possible level of safety.
Easy to use
User-friendly interface and simple
Defeat malwares with a few clicks instead of the long and boring procedures manuals .
Extraordinarily fast
High-speed scanning system.
No slowdowns in the system to proactively

Slow computers are really annoying and programs. This is not the case of Trojan Killer. Adheres your PC in minutes, effectively and convincingly. Trojan Killer reacts immediately upon detection of threats and prevents any attempt to damage your data.

Setup Download: 20.93 MB

Patch and Keygen Downlaod :

Notepad++ 6.3.3 Final

/

http://upload.wikimedia.org/wikipedia/commons/f/f5/Notepad_plus_plus.png

Programmer ေတြ၊ Software Developer ေတြ၊ Web Designer ေတြ သံုးတဲ့ Notepad++ 6.3.3 ျဖစ္ပါတယ္.. အသံုးလုိသူမ်ား ေဒါင္းႏိုင္ပါၿပီ..
Feature Notepad++ 6.3 Final
Syntax Highlighting and Syntax Folding
WYSIWYG
User Defined Syntax Highlighting
Auto-completion
Multi-Document
Multi-View
Regular Expression Search/Replace supported
Full Drag 'N' Drop supported
Dynamic position of Views
File Status Auto-detection
Zoom in and zoom out
Multi-Language environment supported
Bookmark
Brace and Indent guideline Highlighting
Macro recording and playback

Download : 6.52 MB

Aurora 3D Presentation 13.05.25 Full

/
ေၾကာ္ျငာလုပ္ငန္းေတြ၊ ကုမၸဏီေတြ၊ Meeting ခဏခဏလုပ္ရတဲ့သူေတြမွာ ကိုယ္ေျပာခ်င္၊ ျပခ်င္တဲ့အခ်က္အလက္ေတြကို Presentation သံုးျပီးျပၾကေလ့ရွိပါတယ္.. အစိုးရ ႐ံုးသမားေတြကေတာ့ Microsoft PowerPoint ကို အသံုးျပဳေလ့ရွိေပမယ့္ အစိုးရဌာနမဟုတ္တဲ့သူေတြကေတာ့ လွပၿပီး ဒီဇိုင္းဆန္းတဲ့ Presentation ေတြကို အသံုးျပဳၾကပါတယ္.. Aurora 3D Presentation 13.05.25 က ေသသပ္လွပတဲ့ ဒီဇိုင္းေတြနဲ႔ ဆြဲေဆာင္မႈရွိတဲ့ Presentation ေတြကို လြယ္လြယ္ကူကူ ဖန္တီးေပးႏိုင္ပါတယ္.. ပံုရိပ္အတြက္ 3D ေတြဖန္တီးႏိုင္တဲ့အတြက္ ပိုမိုေျပာင္ေျမာက္တဲ့ ဒီဇိုင္းေတြနဲ႔ ျပသေပးႏိုင္မွာျဖစ္ပါတယ္..
some key features of "Presentation3D":
Navigation:
· This is specifically designed to make browsing interactive, allowing you to freely cross between a number of presentations. You can create a link in the navigation for any presentation, web or local file and executable program. It's a way to show more flexibility and more convenience.
Wall of image:
· You can use the new way to get your product and ideas, convey messages. You can customize the description of the image and automatically switch the display. The Wall of image provides a variety of images to display photos and information, including the circular array, curved array, etc.. and uses a change of special animation mode.
Table:
· Offers a new way of organizing data using tables. You can import format CSV file created by Excel. Simply select the style , fill in the details to finish. Using the data and tables with special animation switch, you can achieve multiple tables and data visualizations.
Data Graph:
· A more intuitive and easier to understand the data graph, including bar charts, pie chart, line graph, area and other graph - you can use the 3D way to present your data, reflecting the trend. Updates the data, the graph can be animated in real time. It's awesome.
3D Model:
· If you like to more complex 3D models, this program is perfect for you. You can import the 3DS file format and use the texture and texture effects. In the presentation you can change the color, rotation, scaling and other operations, so that users can view your models completely. This is great.
Album:
· When you need to display many images, the album is a good choice, similar to the picture wall, but at the same time can only display an image and description. This gives you enough room to zoom in and describe your image. And you can select the switching animation to draw people's attention.
Particle:
· You will have the most splendid scene effects, such as space radiation, rain, snow , fireworks, smoke, etc.. With these, you are free to improve the scenes, when you need to get attention, when you need to highlight your special features.
Text:
· Includes 2D and 3D text. 2D text has the outline and shadow, 3D text can be set to texture effects, gradients, bevel styles, and all text can have a variety of fonts, alignment, spacing, line logo and so on. This text editing program is more effective. Surely you'll love.
Form:
· Software provides up to dozens of shapes. You can use a variety of shapes such as circles, rectangles, triangles, stars, all kinds of arrows and cube, cylinder, cone, sphere, etc.. These shapes can not only quickly change the style, but also can transform each other.
Multimedia:
· The software can import a variety of image file formats (JPG, PNG, BMP, TIF, GIF, SVG) and video (MPG, AVI, WMV, ASF, RM, RMVB). You can stream video and pause and images may increase the effects, like black and white, mosaic, diffuse reflection. No need to modify them in other software.
Fund:
· You can choose from a variety of backgrounds , including colors, images, dynamic and model 'skybox'. They can have regular exercise, also can be a virtual reality environment. This will make you feel very special and have the flexibility to use them on any occasion.
Handler:
· The manipulator can easily adjust the attributes of the object. The manipulator can perform almost all space operations, including rotation, scaling, moving and adjusting the depth, length, width. No more annoying adjust settings, simply click and drag.

Download : 78.48 MB

Ulead Video studio 12 Full

/
တစ္ခ်ိန္တစ္ခါက Ulead ကို အသံုးေတာ္ေတာ္မ်ားခဲ့ၿပီး ခုလည္း တစ္ခ်ဳိ႕က အႀကိဳက္ သံုးေနၾကတာကို ေတြ႕ေနရပါတယ္.. Video Editing လုပ္တဲ့ေနရာမွာ သူလည္း ေကာင္းပါတယ္.. သံုးတတ္သူေတြ သံုးေနတာျမင္ရတာ သိပ္ေက်နပ္စရာ Software ေကာင္းတစ္ခုပါ..
Editing + DVD Authoring All the editing and authoring tools found in the standard version, PLUS unique and powerful features including full HD DVD authoring, AVCHD support, Dolby Digital 5.1 surround sound and a full set of easy corrective and creative filters.
This program allows us to import videos directly from our camera, crop them, edit them and apply effects, and also to add titles and music, and all this easily, due to the fact that it has a menu based on tabs that will guide us during the full process.

Download :

Ubantu OS မွာ ျမန္မာေဖာင့္သြင္းနည္းႏွင့္ စာအုပ္

/
Ubuntu မွာ ျမန္မာေဖာင့္သြင္းနည္းေလးေျပာျပေပးသြားမွာျဖစ္ပါတယ္…ပထမဆုံးေနနဲ႔ လိုအပ္တဲ့ zawgyi font ကို zawgyi-keyboard.googlecode.com ကေနသြားေဒါင္းလုိက္ပါ zawgyi keyboard-0.3.3 tar.gz ကိုေဒါင္းပါ။ေဒါင္းျပိးသြားရင္ ရတဲ့လာတဲ့ ေကာင္ကို desktop မွာသြားတင္ထားလိုက္ပါ ကြ်န္ေတာ္တို႔ zawgyi font  install လုပ္ဖုိ႔တြက္ terminal ထဲ၀င္ရပါမယ္ ctrl+Alt+t  ႏွိပ္လုိက္ပါက terminal ေပါလာပါမယ္ ကြ်န္ေတာ္တို႔ပထမဆုံး terminal ထဲတြင္ cd ~/Desktop  ဆိုတာ ရုိက္လုိက္ ပါ ျပိးရင္ ls ဆိုျပိးထပ္ရုိက္လုိက္ပါကာ ေအာက္ကပုံတိုင္းျမင္ရပါမယ္..

 
ဒီ tar xzf zawgyi_keyboard-0.3.3.tar.gz  ဆိုတဲ့ command ေလးကို ရိုက္ျပိး enter ေခါက္လိုက္ပါ ေအာက္ကပုံလုိျမင္ရပါမယ္

tar xzf ဆိုတာကဖုိင္ကိုေျဖဖို႔သုံးလိုက္တဲ့ command ပါ  ျပိးရင္ ls ဆိုျပိးရုိက္ထည့္လုိက္ပါက zawgyi ဆိုျပိးဖိုင္တစ္ခုတိုးလာကိုေတြ႔ရပါလိမ့္မယ္  ျပိးရင္ကြ်န္ေတာ္တို႔ zawgyi font ကိုစျပိး install လုပ္ေတာ့ မွာပါ။ sudo python zawgyi_keyboard.py  လို႔ရုိက္ျပိးenter ေခါက္လုိက္ပါက ေအာက္က တိုင္းျမင္ ရပါလိမ့္မယ္

Password ေတာင္းပါလိမ့္မယ္ password ရိုက္တဲ့ခါ စာလုံးကိုျမင္ရမွာမပာုတ္ပါဘူး ရိုက္ျပိးရင္ enter ေပ့ါေနာ္အေပါကပုံတိုင္း ျမင္ရျပိဆိုရင္ install လုပ္မွာျဖစ္တဲ့တြက္ I  လို႔ရိုက္ျပိး enter ေခါက္ လုိက္ပါေအာက္ကပုံတိုင္းျမင္ရပါလိမ့္မယ္ ေအာက္ကပုံမွာျမင္ရတဲ့ Removing previous installed zawgyi desktop file..ဆိုတာက ကြ်န္ေတာ့္မွာ zawgyi သြင္းျပိးျဖစ္လို႔ပါ . ျပိးသြားရင္ေတာ့ restart ခ်လုိက္ပါ zawgyi font သြင္းျပိးသြားပါျပီ


ကိုေဇယ်ာ အပါအဝင္ အျခား လိုအပ္သူမ်ားအတြက္ Ubantu OS မွာ ျမန္မာေဖာင့္သြင္းနည္း စာအုပ္ကို လည္း တင္ေပးလိုက္ပါတယ္.. Myanmar Font & Key Magic ကုိလည္း တင္ေပးလိုက္ပါတယ္.. လိုအပ္သလို သံုးလို႔ရေအာင္လို႔ပါ..


Download Ebook : 

************

Download Zawgyi Keyboard and Font:

Download Myanmar Font & Key Magic :

Website ေတြ ေရးဆြဲႏိုင္တဲ့ Artisteer 4.1.0.60046 Full

/


Artisteer ေဆာ့ဖ္ဝဲက Joomla, Blogger, Wordpress, Drupal ေလးခုလံုးနဲ႔ေရးရတဲ့ Website ေတြကို ဒီေကာင္တစ္ခုတည္းနဲ႔သံုးၿပီးေရးႏိုင္ပါတယ္.. XHtml, CSS ကုဒ္ေတြနဲ႔ ဒီဇိုင္းေပါင္းစပ္ေရးဆြဲႏိုင္ၿပီး Dreamwaver, Photoshop တို႔လို ႀကီးမားတဲ့ Software ေတြ မလိုဘဲ CMS Template ေတြ၊ Wordpress Themes ေတြကို လွလွပပေသေသသပ္သပ္ေရးဆြဲႏိုင္ပါတယ္.. Firfox, Opera, IE, Google Chrome, Safari စတဲ့ Browser ေတြကို Support ေပးႏိုင္ၿပီး XHTML 1.0 Transitional, CSS 2, Section508 (partially) စတဲ့ Standard ကို Support ေပးႏိုင္ပါတယ္.. png ဖိုင္ေတြကို Transparent လည္း လုပ္ေပးႏိုင္ပါတယ္..
လိုအပ္တဲ့ Requirements ေတြကေတာ့-

· Intel or AMD 1500 MHz or higher
· 100 MB of free space on the hard drive
· 512 MB of RAM or more
· Microsoft. NET Framework ျဖစ္ပါတယ္..
Artisteer is the first and unique product of automation of web design which instantly creates websites templates and fantastic looking blog. It is a powerful software that makes you a professional Web designer of websites, WordPress themes and blog templates.
Artisteer allows its users to easily create templates and designs fantastic looking website within minutes, without even having to know anything about editing graphics or HTML.
With Artisteer you immediately become a Web design expert, editing and fragmentation in the graphics, coding XHTML and CSS, and creating CMS templates and WordPress themes - all in minutes, without Photoshop or Dreamweaver, and no technical skills.
Use Artisteer to generate web design attractive ideas, adjust the generated designs using many included elements, backgrounds , photo objects and buttons, create professional code and fully supports HTML and CSS and export your design in order to create great looking templates for websites and blogs. Create wonderful designs has never been easier.

Download : 120.74 MB

Digital Life Journal အတြဲ(၂)၊ အမွတ္ (၃)

/
ဒီပတ္ထုတ္ Digital Life Journal အတြဲ(၂)၊ အမွတ္ (၃) ဂ်ာနယ္ကို ေဒါင္းလိုသူမ်ား ေဒါင္းႏိုင္ပါၿပီ

Window 8 မွာ Window Media Player မပါသူမ်ားအတြက္

/

 
Window 8 မွာ Window Media Player မပါလို႕စိတ္ညစ္ေနပါသလား
ဒီမွာ Download ဆြဲျပီး ထပ္ ေဒါင္းလိုက္ပါ ... 64 နဲ႕ 32 ၾကည့္ျပီးဆြဲလိုက္ေနာ္ 
အားလံုးအဆင္ေျပသြားေစရမယ္ မူရင္းလင့္အတိုင္းတင္ေပးထားတယ္ေနာ္
လိုခ်င္ရင္ေတာ့ေအာက္မွာေဒါင္းယူသြားလုိက္ပါ .......

Windows တင္ၿပီး Driver လိုအပ္ေနတဲ့သူေတြအတြက္ Uniblue DriverScanner 2013 4.0.10.0 With Key

/
အ၇င္ကလည္းအခု software ကုိတင္ေပးဖူးပါတယ္။
အခု update အသစ္ထြက္လိုတင္ေပးလိုက္ပါတယ္။မိမိကြန္ပၽဴတာမွာ
လိုအပ္ေနတဲ့ driver ကို auto download လုပ္ေပးၿပီး install လုပ္ေပးပါတယ္။
ဒါေပမဲ့ internet ရွိဖိုေတာ့လိုလိမ့္မယ္
Os : Xp/Vista/7/8

၁၅၀၀ တန္ CDMA ဖုန္း ( Android handset အမ်ိဳးအစား) မ်ားအတြက္ အင္တာနက္ Setting ထည့္နည္း

/


၁၅၀၀ တန္ CDMA ဖုန္း ( Android handset အမ်ိဳးအစား) မ်ားအတြက္ အင္တာနက္ Setting ထည့္နည္းကုိ HARRIS မွ users မ်ားအတြက္တင္ေပးလုိက္ပါတယ္။
Internet Setting ထည့္နည္း
၁ – ဖုန္းရဲ႕ Setting ထဲကို၀င္ပါ
၂ – Wireless & networks ထဲ၀င္ပါ (သုိ႕မဟုတ္) Android version 4.0 ႏွင့္အထက္ဖုန္းမ်ားျဖစ္ပါက Wireless & Network က႑ေအာက္က More… ထဲသုိ႕၀င္ပါ။


၃ – Mobile networks ထဲကို၀င္ပါ
၄ – Access Point Names ကို၀င္ပါ
၅ – Menu Key ( မ်ဥ္းေၾကာင္းသံုးေၾကာင္းထပ္) ကိုႏွိပ္ၿပီး New APN ကိုႏွိ္ပ္ပါ
၆ – ေအာက္ပါအတိုင္းလိုက္ျဖည့္ပါ
Name – မိမိႏွစ္သက္ရာ ( ႀကိဳက္တဲ့နာမည္ေပးပါ။ ဥပမာ – mectel )
APN – #777
Proxy – ဘာမွမထည့္ပါ
Port – ဘာမွမထည့္ပါ
username – mectel@c800.mm
Password – 0000
Server – ဘာမွမထည့္ပါ
MMSC – ဘာမွမထည့္ပါ
MMS Proxy – ဘာမွမထည့္ပါ
MMS Port -ဘာမွမထည့္ပါ
MMC – 414 လို႕ေပၚေနရပါမယ္
MNC – 01 လို႔ေပၚေနရပါမယ္
Authentication Type – PAP or CHAP
APN type – * ( * ဒါေလးပဲေရးလိုက္ပါ )
APN Protocol = IPv4 ကိုေရြးပါ
ဒါေတြအားလံုးၿပီးသြားရင္ menu key ကိုႏွိပ္ၿပီး Save (or) Done ကိုႏွိပ္ပါ
ဒါဆုိရင္ အင္တာနက္ setting ထည့္ျခင္းအဆင့္ျပီးပါျပီ။

ဖုန္းအင္တာနက္ကြန္နက္ရွင္ကုိဖြင့္နည္း
ဖုန္းကေန အင္တာနက္စတင္သုံးစြဲမယ္ဆုိရင္ ေအာက္ပါအတုိင္းလုပ္ရုံပါပဲ။
၁ – setting ကို၀င္
၂ – Wireless & Networks ထဲကို၀င္
၃ – Mobile Network ထဲကို၀င္
၄ – Data Enable ကို အမွန္ျခစ္ေပးလိုက္ပါ
ဒါဆိုရင္ သင့္ဖုန္းရဲ႕ Notification Bar ( အေပၚဘက္ လိုင္းအားၿပေသာေနရာ နံေဘး) တြင္
အေပၚတက္ေအာက္ဆင္း ျမွားေလးတစ္ခုေပၚလာပါ့မယ္ အင္တာနက္စသံုးလို႕ရပါၿပီ။

IDM ကို Crack ,Patch မသံုးပဲ Full Version ျဖစ္ေအာင္လုပ္ၾကမယ္

/


  IDM ကို Crack ,Patch မသံုးပဲ Full Version ျဖစ္ေအာင္လုပ္လို႔ရတဲ႔ နည္းလမ္းေလးပါေနာ္..... Crack  တို႕  Patch တို႕ သံုးရတာ တခါတေလ Antivirus ေၾကာင့္ ဖြင့္မရတာေတြ ျဖစ္ျဖစ္ေနလို႔ပါ တယ္...
 IDM မရွိေသးရင္ ဒီမူရင္းဆိုက္ဒ္  ကေနေဒါင္းယူပါ ... ရိွျပီးသားဆိုရင္ Update လုပ္လုိက္ပါ။ ျပီးရင္ ကြန္ျပဴတာထဲကိုဖြင့္လုိက္ပါ... ေအာက္ကတိုင္းအစဥ္လိုက္ သြားေနာ္... DiskC: ကိုဖြင့္  Windows  ဆိုတာကိုရွာ ကလစ္ System32  ကိုဆက္ကလစ္ပါ drivers  ဆိုတာကိုရွာပါetc ကိုေတြ႕ရင္ ကလစ္လိုက္ပါ   hosts ဆိုတဲ့ဖိုင္လ္ေလးကိုေတြ႕ရပါ့မယ္..  သဴ႕ကိုေတြ႕တာနဲ႕desktop ေပၚမွာေမာက္နဲ႕ မေရႊ႕ေပးလုိက္ေပါ့  .အဲလိုခါမွာ ေဘာက္ေလးတစ္ခုက်လာမယ္..contune ဆိုတာကိုကလစ္ေပးပါ..ေရႊ႕ျပီး ဇယားေလးကို မပိတ္နဲ႕အုံးေနာ္ သူ႕ေနရာျပန္ထည့္ရအုံးမယ္.ေနာက္ ေရႊ႕ထားတဲ့ desktop ေပၚက ပုံေလးကို Double Click ျပီး  notepad နဲ႕ဖြင့္လုိက္ပါ။ ျပီးရင္

127.0.0.1 tonec.com
127.0.0.1 www.tonec.com
127.0.0.1 registeridm.com
127.0.0.1 www.registeridm.com
127.0.0.1 secure.registeridm.com
127.0.0.1 internetdownloadmanager.com
127.0.0.1 www.internetdownloadmanager.com
127.0.0.1 secure.internetdownloadmanager.com
127.0.0.1 mirror.internetdownloadmanager.com
127.0.0.1 mirror2.internetdownloadmanager.com


ဒီ အေပၚက အနီေရာင္ နဲ႔ ကုဒ္ေတြအားလံုးကို Copy ကူးျပီး ထည့္ေပးပါပီးရင္ Save လုပ္ပါ။
ျပီးတာနဲ႕ အဲ Desktop ေပၚကဖိုင္ေလးကို ေစာေစာကေရႊ႕လာခဲ့တဲ့ ဇယားေဘာက္ေလးထဲကို ျပန္ထားေပးလုိက္ပါ......

ျပီးရင္ IDM ကိုဖြင့္ပါ  Registration ကိုႏွိပ္ျပီး First Name , Last Name , Email ေတြကို ၾကိဳကႏွစ္သက္ရာေရးထည့္ျပီး Serial Key ေနရာမွာ ေအာက္မွာေပးထားတဲ့ထဲကက အစိမ္းေရာင္နဲ႔ ေပးထားတဲ႔ ကီးေတြထဲက တခုခုကို Copy ကူးျပီး ထည့္ေပးပါ ....ျပီးရင္  OK ႏွိပ္ျပီး  Register လုပ္ေပးလိုက္ပါ... IDM Full Version ျဖစ္သြားပါျပီ.... အားလံုး အဆင္ေျပေအာင္ Video ေလးပါ တင္ေပးလိုက္ပါတယ္...။။

 ထည့္ရန္ Srial Key မ်ား


RLDGN-OV9WU-5W589-6VZH1

HUDWE-UO689-6D27B-YM28M

UK3DV-E0MNW-MLQYX-GENA1

398ND-QNAGY-CMMZU-ZPI39
 
 ဒါဟာ အလြယ္ကူဆုံးနည္းလမ္းဘဲ ျဖစ္ပါတယ္..

KaraWin Std 3.9.0.0.rar (3.41 Mb)

/
ကြန္ပ်ဴ တာမွာ သီခ်င္းဆိုခ်င္တဲ့ သူငယ္ခ်င္းေတြအတြက္ အသံုးတည့္မယ္ေဆာစ့္၀ဲလ္ေလးပါ
သူက အသံ တီးလံုး ၾကိဳက္တာေဖ်ာက္လုိ႔ရပါတယ္  Rap သီခ်င္း လုပ္တာ
သီခ်င္းေတြကုိ ျမန္တာေနွးတာ စသည္ျဖင့္ လုပ္ေဆာင္ခ်က္ေတြရွိပါတယ္
အျပည့္စံုကုိေတာ့ http://www.karawin.fr/karaoke-enst.php မွာေလ့လာနုိင္ပါတယ္
အသံုးျပဳမယ္ဆိုရင္ ေအာက္ကလိပ္စာမွာရယူနုိင္ပါတယ္
Rar Pass>>>amyokaungtarr
လုိင္စင္ထည့္တဲ့အခ်ိန္မွာ အင္တာနက္ေလး ပိတ္ထားပါ

Download Microsoft Office Pro 2013 Full Version ( 32 & 64 Bit )

/
Microsoft Office Pro 2013 အသံုးျပဳလိုသူမ်ားအတြက္ 32 Bit နဲ႕ 64 Bit တင္ေပးလုိက္ပါတယ္။
Serial , Keygen , Activator သံုးမ်ိဳးတင္ေပးလိုက္ပါတယ္:-)


Download Setup For 32 Bit => Download

Download Setup For 64 Bit => Download

Download Serial => Download

Download Keygen => Download

Download Activator => Download


System Requirement:

  • Processor: 1 GHz or greater x86/x64 Processor with SSE2 instruction set
  • Memory: 1 GB RAM (32-bit)
  • Hard Disk: 3.5 GB free disk space
  • Operating System: Windows 7, Windows 8, Windows Server 2008 R2 or newer
  • Graphics: Graphics hardware acceleration requires DirectX10 graphics card.
**  Step-1.ေအာက္က Download Button ကိုႏွိပ္လိုက္ပါ  
**  Step-2. "5sec". ေလာက္ေစာင္႕ေပးပါ။
**  Step-3. "  << SKIP AD >>   ".ကိုႏွိပ္ေပးပါ။
**  Step-4. Download Link က်လာပါလိမ္႕မယ္။
**  အဆင္ေျပပါေစဗ်ာ။


    Internet Explorer မွာZawgyi-One ေရြးေသာ္လည္း ျမန္မာလိုမျမင္ရတာကိုေျဖရွင္းနည္း

    /


    Internet Explorer မွာ Zawgyi-One ေရြးေသာ္လည္း ျမန္မာလိုမျမင္ရတာကိုေျဖရွင္းနည္း ေလးတင္ေပး
    လိုက္ပါတယ္ျမန္မာစာ ၊ စာလံုးေတြ အတံုးအတံုးေတြအျဖစ္နဲ ့မျမင္ရတဲ ့အခါ ...
    ပထမဆုံး notepad ကုိ ဖြင့္ၿပီး.......................... 
    body
    {
    font-family:Zawgyi-one;
    }
    input, select , textarea
    {
    font-family:Zawgyi-one;
    }


    ဆုိၿပီး ရုိက္လုိက္ပါ... ၿပီးရင္ Save as သြားၿပီး ie.css နဲ႔ save လုိက္ပါ။

    ၿပီးရင္ IE ကုိ ဖြင့္ၿပီး Tools==>Internet Option==> Accessibility ကိုသြားပါ။

    ၿပီးရင္ Ignore font styles specif...ied on webpages ႏွင့္

    Format documents using my style sheet တုိ႔ကို check လုပ္လုိက္ပါ။

    ၿပီးရင္ Browse ကေန အရင္ save ထားတဲ့ ie.css ဖုိင္ေလးကုိ ေရြးလုိက္ပါ။

    ၿပီးရင္ OK ေပးပါ။ OK ထပ္ေပးပါ။

    အဲဒါဆုိရင္ IE မွာ ေဇာ္ဂ်ီေဖာင့္ကုိေကာင္းစြာ အသုံးျပဳလုိ႔ ရသြားပါၿပီ။

    Xrecode II 1.0.0.203 FULL Free Download 2014 (19 MB )

    /
    Audio မ်ားကို Format ေပါင္းစံု သို႕ေျပာင္းလဲေပးႏိုင္တဲ့ Software ေကာင္းေလးတစ္ခုျဖစ္ပါတယ္..ေအာက္
    မွာ ေျပာင္းေပးႏိုင္တဲ့ Format Extension မ်ားကိုျပထားပါတယ္..လိုအပ္သူမ်ား Download ရယူႏိုင္ၾကပါၿပီ
     
     
    XRecode II is converter and audio-grabber which allows you to convert from mp3, mp2, wma, aiff, amr, ogg, flac, ape, cue, ac3, wv, mpc, mid, cue ,tta, tak, wav, wav(rf64), dts, m4a, m4b, mp4, ra, rm, aac, avi, mpg, vob, mkv, mka, flv, swf, mov, ofr, wmv, divx, m4v, spx, 3gp, 3g2, m2v, m4v, ts, m2ts, adts, shn, tak, xm, mod, s3m, it, mtm, umx, mlp to m4a, alac, ape, flac, mp3, mp4 (using NeroAAC), ogg, raw, wav, wav(rf64), wma, WavPack, mpc, mp2, Speex, ofr, ac3, aiff, tak and Shorten formats.

    Features

    – Works on XP, Vista, Windows 7 32/64 bit versions.
    – Parallel conversion by utilizing power of multi-core CPUs.
    – Support of embedded CUE sheets (for FLAC, WavPack, APE and TAK files).
    – Support of mp4, mka chapters (can split mp4, mka by chapters to any supported format).
    – Built-in Metadata editor with Cover Art support.
    – Has support for LossyWav.
    – Supports portable mode.
    – Merge input files to one large audio file and create CUE sheet.
    – Converting to many formats at once using “Multiple” output mode.
    – Grabbing of multi-channel Audio CDs to the desired format at once.
    – Informative and resizable UI suited even for netbooks.
    – Extracting audio from flv, avi, mov etc. video files (multiple audio streams are supported).
    – Can export/import Metadata to/from external file.
    – Support for 24/32bit audio files.
    – Multilanguage support. Currently program is available in English, French, Japanese, Polish, Russian, Hungarian, Italian, Spanish, Spanish Traditional, Swedish, Brazilian Portuguese, German, Finnish, Bulgarian, Czech, Danish and Chinese (simplified) languages.
    – And more.

    Home Page - http://xrecode.com/

    Windows 8 တြင္ Windows Store ကို SecurityKiss သံုးျပီးဝင္နည္း

    /


    http://www.myanmarmobileapp.com/wp-content/uploads/2013/05/05483975-photo-windows-store-logo-205x120.png 

    Windows Store ကို ျမန္မာႏိုင္ငံ IP နဲ႔ဝင္လို႔မရပါဘူး။ အဲ့ဒါေၾကာင့္ VPN (Virtual Private Network) သံုးၿပီးဝင္ရပါမယ္။
    Securitykiss tunnel ကို download လုပ္ပါ။ ၿပီးသြားရင္ Internet ဖြင့္ၿပီး install လုပ္ပါ။ SecurityKiss ကို install လုပ္ၿပီးပါက connect ဆိုတာကို ႏွိပ္ၿပီး ခဏေစာင့္ပါ။ connected ဆိုတာ ျဖစ္သြားရင္ေတာ့ windows store ကိုဝင္လို႔ရၿပီျဖစ္ပါတယ္။ တစ္ခုရွိတာက Free Version က တစ္ေန႔ကို 300 MB ပဲေပးသံုးတယ္။ သံုးေနရင္ disconnect လုပ္လိုက္ရင္ windows store ကိုဝင္လို႔မရေတာ့မွာျဖစ္ၿပီး restart ခ်မွသာရမွာ ျဖစ္ပါတယ္။ windows store ကိုမဖြင့္ခင္ SecurityKiss ကိုအရင္ဖြင့္ထားေပးဖို႔လိုပါတယ္။

    Download SecurityKiss

    idoo File Encryption Pro 5.6 For Windows 7//Xp/Vista (3.11 Mb)

    /
     ဖုိင္ေတြ Disk ေတြကုိ အလြယ္တကူ Password ခံထားလိုရပါတယ္
    ျပီးေတာ့ အျခား အမ်ဳိးစားေတြလို တကူးတက ေဆာစ့္၀ဲလ္ဆီသြားပီဖြင့္စရာမလိုပါဘူး
    ကုိယ္ ေသာ့ခတ္တဲ့ဖုိင္ကုိ ကလစ္လိုက္တာနဲ႔ Passwordေတာင္းပါတယ္
    ကုိယ္ျပန္ပိတ္လိုက္တဲ့ ေသာ့ခတ္ျပီးသားျပန္ျဖစ္သြားပါတယ္
    အျခားေဆာစ့္၀ဲလ္ေတြသာတာ တစ္ခုက Password ေမ့လညး္ျပသနာမရွိပါဘူး
    ေဆာစ့္၀ဲလ္ကုိ Install လုပ္တာနဲ႔ Password ရယ္ Gmail ရယ္ျဖည့္ေပးရပါတယ္
    ေဆာစ့္၀လ္ကုိဖြင့္ Forget Password ဆိုတာေလးကုိကလစ္လိုက္ရင္


    ကုိယ္ထည့္တဲ့ဂ်ီေမးကုိ Password  ေလးျပန္ပုိ႔ေပးပါတယ္


    အျခားလုပ္ေဆာင္ခ်က္ေတြလညး္ရွိပါတယ္

    http://www.idooencryption.com/idoo-file-encryption.htm

    မွာေလ့လာျပီး ၾကိဳက္ရင္ ေအာက္လိပ္စာမွာရယူနုိင္ပါတယ္

    Download>>>> mirrorupload(or)sendspace (or)zippyshare
    Rar Pass>>>>amyokaungtarr

    စစသြင္းခ်င္းမွာ Password ရယ္ Gmail ရယ္ျဖည့္ေပးရပါတယ္
    ျပီးမွ Install လုပ္လို႔ရပါတယ္ ျပီးရင္ ေဆာစ့္၀ဲလ္ကုိဖြင့္ လိုင္စင္ကုတ္ပါ နာမည္မွာ ကိုယ့္နာမည္ထည့္
    အဆင္ေျပပါျပီ


    Windows 8 Beginner Guide

    /


    windows8

    Windows 8 စသံုးတဲ့သူေတြအတြက္ Beginner Guide ပါ။ ေအာက္ကလင့္မွာ Download ယူႏိုင္ပါတယ္။

    Download Here

    Smart Pro Journal အတြဲ (၁) အမွတ္ (၁၇) ၂၉.၅.၂၀၁၃

    /


    အပတ္စဥ္တင္ဆက္ေပးေတာ့မယ့္ျဖစ္ေသာ Smart Pro Journal အတြဲ (၁) အမွတ္ (၁၇) ၂၉.၅.၂၀၁၃ ကုိေအာက္က link မွာရယူနုိင္ပါျပီ။

    Download Here:


    Mirror link: Smart Pro Journal အတြဲ (၁) အမွတ္ (၁၇) ၂၉.၅.၂၀၁၃ အားရယူရန္

    Mobile Guide Issue Vol-2 ၊ Issue 104 (27.5.13)

    /


    Mobile Guide ဂ်ာနယ္ကို အပတ္စဥ္ ဗုဒၵဟူးေန႕တိုင္းတင္ေပးသြားမွာျဖစ္ပါတယ္။ Mobile Guide ဂ်ာနယ္ ကိုဖတ္ခ်င္သူမ်ားအတြက္မူရင္းဆိုဒ္က ေနျပီး ေဒါင္းလုပ္လင္႕ကိုတင္ေပးလိုက္တာပါဗ်ာ။ Mobile Guide ဂ်ာနယ္၀ယ္ဖတ္စရာမလိုေတာ႕ဘူးေပါ႕။ အခုအပတ္မွာ Mobile Guide Journal Vol(2), Issue (104)ကို တင္ေပးလိုက္ပါတယ္ဗ်ာ။ ဒီေန႕ 27 ရက္ေန႕ထြက္ Update ေလးပါ။ 
     
    **  Step-1.ေအာက္က Download Button ကိုႏွိပ္လိုက္ပါ  
    **  Step-2. "5sec". ေလာက္ေစာင္႕ေပးပါ။
    **  Step-3. "  << SKIP AD >>   ".ကိုႏွိပ္ေပးပါ။
    **  Step-4. Download Link က်လာပါလိမ္႕မယ္။
    **  အဆင္ေျပပါေစဗ်ာ။